
Introduction
When to use Item Credit Notes
Sales Item Credit Notes are issued to Customers for Items that were previously invoiced and then returned or refused or unrelated Items in the case of damages or breakages. They can be associated with and allocated to an original Invoice or relate to Items with no associated Invoice.
Opening a New Credit Note
Go to Sales > Item Invoices and select New Credit Note.

See:
 Sales Overview (3.0) - AIQ Academy
 Sales Item Invoices / Credit notes (3.2) - AIQ Academy
 Creating Sales Batch Invoices


Creating a Credit Note
Credit Note tab
The Credit Note text is red to differentiate it from an Invoice:

Complete the header details:
- Credit Note No: If you use invoice auto-numbering (taken from the Customer Defaults) then that number will appear. Otherwise, enter a unique number.
-
Customer: This is the Account that you want to create the Credit Note for. To find the Customer Accounts either select from the dropdown or begin typing and the field will auto-fill. Selecting a customer updates multiple fields with values taken from the Customer Master Record. Therefore, to save time, set up your Customer Master Record with as much detail as possible.
Updating Defaults
If you change any of the default information in the Credit Note, it will apply to this Credit Note only and will not be saved back to the original Customer record.
-
Invoice: The dropdown will display a list of unallocated Sales Invoices for the selected Customer. Select the Invoice you want to credit. When you select an Invoice a prompt message will appear:
- Click OK to proceed. This auto-populates the lines on the Sales Item Credit Note from the Sales Item Invoice you selected. You can then edit the lines.
- If you click Cancel because you are creating an unrelated Credit Note, then this field will be left blank.
- Credit Note Date: This defaults to today's date, but you can change it to any prior or future date. If you enter a Credit Note date later than the Current Period in the General Ledger, you will receive notification that the posting is for a future date.
- Due Date: This will be automatically calculated based on the credit terms set in the customer record but you can override it here if needed.
- Order No: This is not a mandatory field. If you chose to pre-populate the Credit Note from a corresponding Sales Invoice, then the order number will come from there. If not, you can enter an order number here for reference purposes, for example, if the Credit Note request originated elsewhere, such as a Purchase Order Reference from a customer.
- Order Date: Taken from the corresponding order.
- Expected Delivery Date: If this credit note does not relate to a specific order already entered on the system you can record the expected delivery date to the customer here. It defaults to today’s date but can be overwritten.
- External Ref: If the Credit Note has not inherited a reference from the corresponding Sales Invoice, you can optionally enter one here for filing purposes.
- Use Acc Tax Code: You can check this box if you want to use the Customer’s Tax Code for this credit note regardless of the tax code of the product. This would normally be checked if, for example, the customer was to be charged at 0% or was exempt.
- Acc Tax Code: This is only relevant if you have ticked Use Acc. Tax Code. It defaults from the corresponding Invoice or else the Customer Account’s Tax Code.
- Dimension Tag: When you select a Customer Account, this field defaults to the Dimension Tag from the Customer Master Record. If you enter an Invoice No., this field and the Credit Note lines default to the Dimension Tag from the Invoice. Alternatively, you can enter a Dimension Tag to assign it to all lines of the Credit Note. If necessary, you can then override the Dimension Tag at line-level.
- On Hold Status: This defaults from the Customer record and indicates the Hold status of this customer. You cannot change it here.
- Sales Area: This is the sales area that will be associated with this credit note from a sales analysis point of view. This is useful to enable you to track sales by area within the dashboard functions in the system.
- Sales Rep: This is the Sales Representative associated with the Customer. You can either use the Sales Rep defaulted here or change it. You can use this in the sales commission report to track sales against each rep.
- Billing Address, City, County, Postcode, Country: This is the Billing Address that will be printed on the sales credit note. It is defaulted to the Billing Address associated with the customer record, but you can change it from here for this specific credit note.
- Customer Contact: The contact name for this Customer comes from the Customer Master Record but you can change it for this Credit Note.
Line Navigation Tips
- To gain more space if you have multiple lines, click Display Lines Only. This removes the Credit Note header information from view.
- To create a line: Tab off the first line to create another line.
- To delete a line: If you want to delete an existing line press F8 on the keyboard. Each line number references a particular Credit Note line. This marks the line for deletion, but the line will not actually be deleted until the Credit Note has been processed.
-
To access a complete line: To access hidden fields, click the arrow symbol beside the Line No.

Complete the Line details:
Stock Items
When you select a line Item, the system will use a different line layout if the item has stock tracking, showing relevant stock fields such as On Hand Quantity. If you choose a Service Item instead, with the stock flag disabled, these fields will not appear.
- Line: This is the line number of the Credit Note. If you have chosen to create a link between the Credit Note and a corresponding Invoice, then all the Credit Note Lines will have been pre-populated from the corresponding Invoice and therefore only require amendment (or deletion).
- Item: If not inherited from the corresponding Invoice, select the Item code from the dropdown. You can also search for the item by entering all or part of the code to return a list. Clicking the Item will return the Item code, Description, and Item price from the Item Master Record.
- Description: This comes from either the Item Master Record or the Invoice. You can change it here if necessary.
- Sales GL Acc No: This is either the default General Ledger Account Number for the Item or comes from the corresponding line Invoice. You can change it on entry or before posting once in Processed/Pro Forma status.
- Dimension Tag: This defaults from either the Credit Note header or from the corresponding Invoice. Otherwise, you can select a Dimension Tag from the dropdown. If necessary, you can change it before posting once in Processed status.
- Qty: Enter the Quantity you want to credit if it has not come from the corresponding Invoice.
- Unit Price: This value is based on the customer’s Price Category or else the corresponding Invoice.
- Net, VAT, (Tax) Amt, Line Total: All these values are calculated by the system based on the Quantity and the Unit Price. The Sales VAT (Tax) value is based on the VAT (Tax) code associated with the Item. However, you can override it by using the Tax Code associated with the Customer. To do this, set it up in their Customer Master Record and tick Use Acc Tax Code in the Credit Note header.
- Line Total: You can override the line total by double-clicking in the field and entering the required amount in the message box that appears. If the amount you enter is more than 110% of the originally calculated value, you will receive a warning. Entering a new amount will automatically reset the Net and Tax amounts so they total the new value.
- Disc Rate: If not inherited from the corresponding Invoice Line, enter the percentage discount you wish for this line in decimal form (for example, 0.05 for 5%).
- Disc Amount: Enter the discount value if applicable.
- Line Note: Any notes you enter will appear on the printed Sales Item Credit Note.
- Exchange Rate: This field displays the default exchange rate currently associated with the chosen Customer or Invoice. However, you can override this.
- Sub Total, VAT (Tax) Total, Total: These are the sum of all the lines you have entered. The Sub Total is the sum of each line entered and is a Net (without tax value). The VAT (Tax) Total sums the VAT on all the lines that have a VAT (Tax) value on them. The Total is the sum of the Sub Total and the VAT (Tax) Total.
- Exchange Rate: For foreign currency customers, the Customer Currency amount and the Base Currency amount appear. If you change the Exchange Rate, the Customer currency total will remain the same, but the Base currency total will be updated.
- View Rate History: This field displays the default exchange rate currently associated with the chosen customer. This can be overwritten if necessary and will be used when posting the credit note to calculate the base currency value of the credit note.
Additional Details tab

- Delivery Address: This comes from the Customer Master Record or Invoice, but you can override it.
- Ship Via: This comes from the Customer Master Record or Invoice, but you can change it to any valid shipper code.
- For Collection: Tick this if the goods are for immediate collection rather than delivery. This means a Dispatch Note will not be printed.
- Discount: If there is a corresponding Invoice, its discount rate will appear here. Alternatively, enter a Discount Rate to apply to all lines on this Credit Note. It must be in decimal format (0.1 for 10%). If you enter a value, the system will request confirmation before applying the discount to all line values. If necessary, you can override the discount on individual lines.
- Account Credit Limit: This is a read-only field that comes from the Customer Master Record.
- Account Balance: This is the remaining balance on the Credit limit. It is a read-only field that comes from the Customer Master Record.
- Branch: If this invoice was first raised in the Customer branch or sub-office then this field will show the sub-office Customer account code.
- Forecasted Payment Date: This date is automatically calculated based on this customer's payment history. The date can be adjusted here, and this will then be used within the Cashflow Forecasting function to predict when this credit note will be paid.
- Printed Note: Record a note here that will be printed on the header of the credit note for customer to view.
- Payment Method: This comes from the corresponding Invoice if present.
- Forecasted Payment Date: Cashflow Forecasting can predict when the customer will settle this credit. This date is calculated automatically based on the customer's payment history. However, you can override it here.
- Printed Note: You can record a note to appear on the Credit Note header for the customer to see.
Notes tab
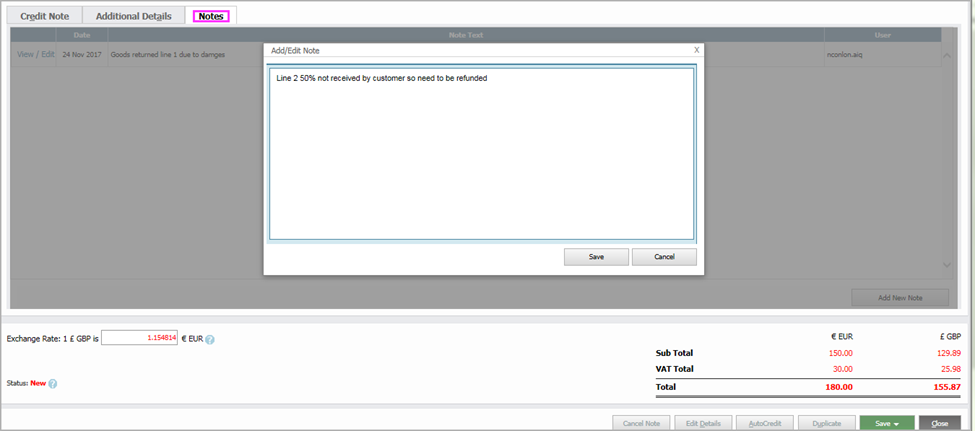
The Notes tab allows you to store notes against your Item Credit Note. Only system users can view the notes. You can also view previously entered notes. See Adding Attachments and Notes to Transactions and Master Records for more details.
To enter new notes:
- Click Add New Note.
- Enter the required note.
- Click Save.

Saving and Posting Credit Notes
After you have entered all your details, click Save. This will present four options:
- Save Credit Note: This will save your Credit Note as a Processed or Pro Forma Credit note. You can continue to update it until you are ready to post.
- Save and Print Credit Note: This will perform the same function as above but will also print a copy of the Credit Note.
- Post Credit Note: This will finalize the Credit note and post it to the Customer and GL accounts.
- Post & Print Credit Note: This is as above but will also print the Credit Note.
Managing Sales Item Credit Notes
Sales Credit Notes can be managed in the Sales Invoice listing grid. Go to Sales > Item Invoices.
Credit Note Status
The listing grid defaults to Processed Invoices, but you can clear this by clicking on the Clear Filter icon. You can then search for SNs by entering SN into the Type column field.
Credit Notes can have the following statuses:
- New: This is a new Item Credit Note. The Item Credit Note is currently unprocessed or stored in the database. If you exit an Item Credit Note with New status and do not process it, the Item Credit Note will not be saved.
- Processed: The Item Credit Note has been saved and is Pro Forma. It has not yet been posted so will not update the Customer account or General Ledger accounts.
- Posted: This means that the Customer’s account and the General Ledger have been updated with the values for this Sales Item Credit note. Note that payments can only be made against posted credit notes.

Posting Credit Notes
- In the Post column, either:
- Select the Credit Notes you want to post and go to Post > Selected.
- Go to Post > All. (If you wish to post most invoices, the quickest option is to select all and simply deselect the few you don't require).

- Click Post Selected.

Print, Email, or Add Attachments
- Go to the Print column and select the format from the relevant Print dropdown. See Printing Sales Documents and Reports.
- Go to the Attach column and click the relevant paperclip icon. See Adding Attachments and Notes to Transactions and Master Records for more details.
- Go to the Email column and click the relevant email icon. See Emailing Sales Invoices and Customer Statements for more details.

Excluding Credit Notes from appearing on a Report
In some instances, you may not want to print a Credit Note, such as for a cash sale. For reports, you can still print the Credit Note by selecting it from the list of available Credit Notes, but it will not print by default.
To exclude a Credit Note from printing on the report:
- In the listing grid, tick Print Excluded. If this column is not present, add it using the grid settings.
- You will receive a confirmation message. Click OK to continue.

Amending Credit Notes
Actions
See Amending Transactions for more information.
Under Actions, select:
- Duplicate: See Duplicating Item Invoices or Notes for more details.
- Cancel Note: This only appears for unposted Credit Notes.
-
Mark as Disputed: For example, if the Customer does not agree with the Credit Note contents.

Editing Credit Notes
See Amending Transactions for more information on editing restrictions.
- To open the Credit Note, click on its number in the grid.
- Unposted Credit Notes can be edited as required.
- For Posted Credit Notes, most fields will be greyed-out and cannot be edited. However, if you click Edit Details then you can edit:
- Credit Note: Order Number, Line Description, Address
- Additional Details: Delivery Address, Payment Method, Printed Note.
- Notes: Add a new internal Note.
- Click Save to update.
