
Introduction
Note
The Excel Add-in is now deprecated. For advanced reporting, we recommend using the OData connector:
What data can I extract?
The Excel Add-In includes several pre-defined database views, including Transactions, Sales Analyses, Purchase Analyses, and Income & Expenditure, which you can filter by date. For speed, you can group selected database view fields. If you use Extended Business Analysis, the Excel Add-In is particularly powerful. For example, you can analyse by Division, Location, Activity, Product, Project, and any combination of these.
See:
 Using Extended Business Analysis
 Using Extended Business Analysis for Job or Project Analysis
Install the Excel Add-In
Before using the Excel Add-In for the first time, download it from the central system onto your PC. If you have several PCs with several instances of Excel, you must do it for each one.
- Go to Setup > Excel Add-in.

- Click Download 32-bit Installer or Download 64-bit Installer as relevant.

- When the download is finished, click Open to go to the download location.
- Double-click setup.exe to open it, then click Run in the pop-up.

- Click Install.

- When the Add-in has been downloaded and installed on your PC, click Close.
Connect the Excel Add-In and AIQ
- Go to Setup > Excel Add-in.
- Enter your Login Password and click Generate Licence Key.
- Copy the key that is generated to the clipboard (Ctrl + C).

- In Excel, go to the Add-Ins tab and click Select Data.

- In the Authorization screen, paste the key into the Key field and enter your Login, and Password. You are now connected from Excel to your database.
Select Reporting Data
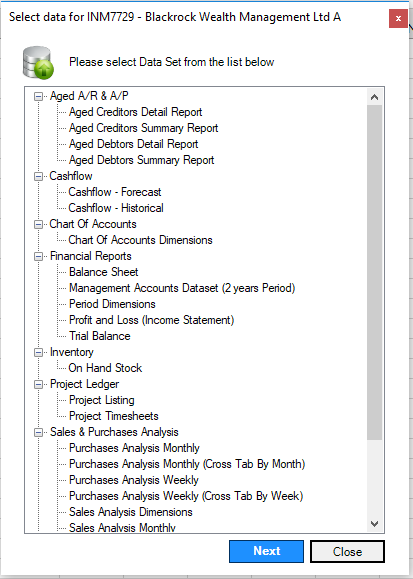
- Select a Data Set for your report and click Next.
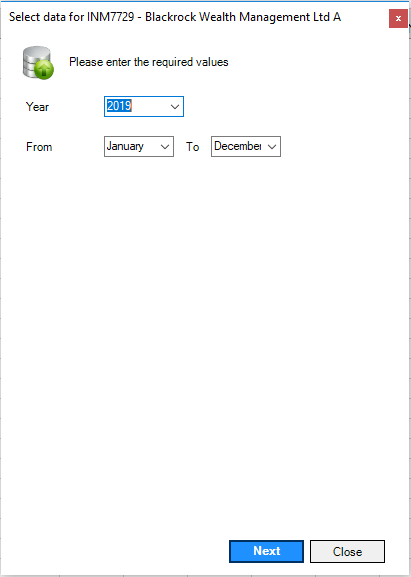
- Pick a reporting period and click Next.
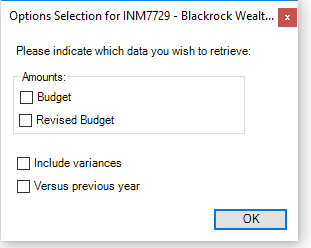
- Set the report filters and click OK.
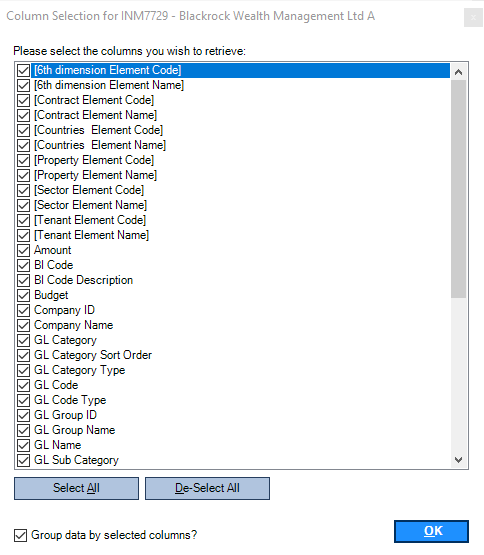
- Nominate which fields to display and click OK.
Save your excel workbook. You can now build and format your report in excel using the data extracted from the system.
Format a Report Pack
The downloaded data items, together with their descriptive headings, will have the formats used internally within the database, and may not initially be suitable for Reporting purposes:

- Copy the columns you want to use to a second spreadsheet in your Workbook.
- Make any Excel formatting adjustments required to make the presentation more acceptable for Reporting purposes. To refine your Reports and Charts into a re-usable Report pack, you can use:
- Sorting
- Filtering
- Formulas
- Charting
- Pivot Table presentation
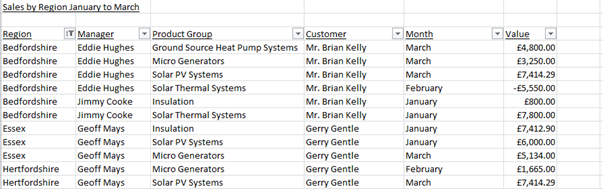
Monthly Sales Analysis could be supplemented with other reports relating to Income & Expenditure, BI Code Analysis, or Purchasing:

Re-Use a Report Pack
When you want to re-use a report pack, for example in the following month:
- Open the Excel Report.
- Go to the Add-Ins tab and click Select Data.
- Enter your login and password details. If you already have a key, it will appear here.
- The saved Report Data View will appear here. Click Next.
- Enter the new Date Range that you want the report to apply. Click Next.
- The previously chosen fields will appear here. Clicking OK will update the reports and charts to the new dates.
Warning
When you open your saved Excel Report Pack, Excel will default to the spreadsheet that was open when you last saved your workbook. If you then download new or additional data, this will be downloaded into that open spreadsheet and may overwrite Reports or Charts. Ensure you have the first spreadsheet open to extract the data correctly.
Refresh Data
Update Report data
To refresh the data in an existing report:
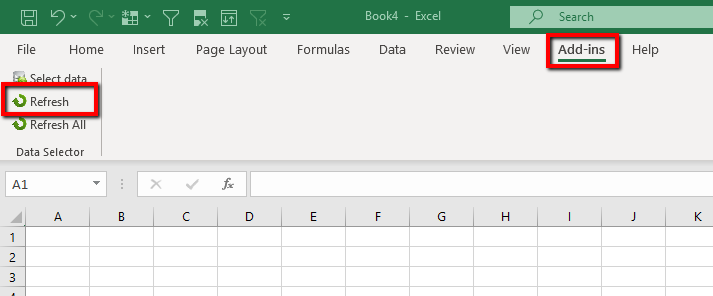
- Open your saved Excel workbook.
- Go to Add-ins > Refresh. This will refresh the data using the same report filters, periods, and fields as selected during setup. Be careful to have the correct spreadsheet in your workbook open when refreshing so data doesn’t get overridden.
Add new data to a report or change the report filters
To refresh the data using the different report filters, periods, or fields to those originally selected:
- Go to Add-ins > Refresh All.

Connect Excel Add-In to a different company
If you have the Excel Add-In enabled for more than one company in your group, and you want to generate a report from a different company, you need to establish a link between Excel and AIQ with a fresh license key and build your report again.
Remember to save a new Excel worksheet for each company as you can only select data for one company at a time.
If you want to generate reports combining data for different companies, try using the Excel Add-In from your consolidation company - see below.
Use Excel Add-In in a consolidation company
- Log into the consolidation company. Unlike in a group company, there is no Excel add-in option under Setup.
- To generate the integration key, go to Setup > Company Details & Settings.

- In the Integration tab, enter your password in the field and click Request User Key. Copy the Key that appears.

- Open a new Excel workbook and go to Add-ins > Select Data.

- Paste the copied licence key, and enter your AIQ User Name and password. Click on OK to connect to AIQ.

You have now connected Excel to your finance system and can build reports as described previously. The consolidation and group/subsidiary companies will have different data sets.
Re-Install the Add-In Software
If you need to re-install the Excel Add-In, you must uninstall the current version:
- On your PC, go to Start and type Add or remove programs. Click this option when it appears.
- Find the program Accounts Data Selector and select it.
- Click Uninstall, followed by OK.

- Download and re-install the Add-in as described previously.
Troubleshooting
I don't see the option to download the add-in or generate the licence key.
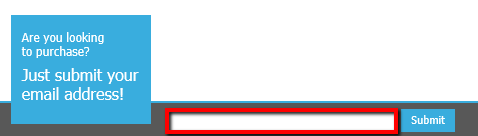
If you see the following screen when you go to Setup > Excel Add-in, this means that the Excel Add-In has not been enabled for the company that you are using.

Check with your account holder that the feature is part of your package.
- If it is, contact support@accountsiq.com to ask for it to be enabled (specifying the company ID).
- If it isn't part of your current package but you would like it to be, click on the link at the bottom of the screen to purchase it for the company you are logged into.
I can’t see the Add-Ins tab in Excel.
- In Excel, go to File > Options.
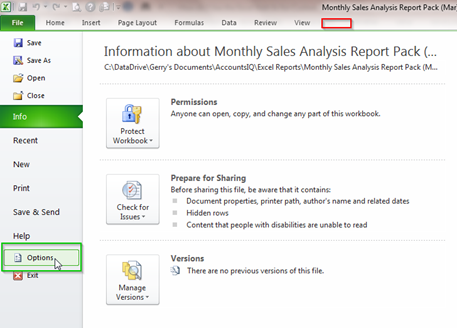
- Click Customize Ribbon and tick Add-Ins. Click OK.

I get an Incorrect password message.
Double-check that you are using the correct password for the company you are logged into.
If you are definitely using the correct password and you still get the message, click Support to raise a ticket or email support@accountsiq.com with the details of the company you are trying to connect to and the error.
How can I download the Excel Add-In if I only connect to a consolidation company?
If you only have the Excel Add-In for the consolidation company in your group and so are not able to download the add-in from a non-consolidation entity, click Support to raise a ticket or email support@accounts.com and we can help you download the add-in.