
Menu Navigation
Browser Compatibility
AccountsIQ can be viewed in Edge, Chrome, and Firefox browsers.
Navigation
When you log in, you will see two menus:
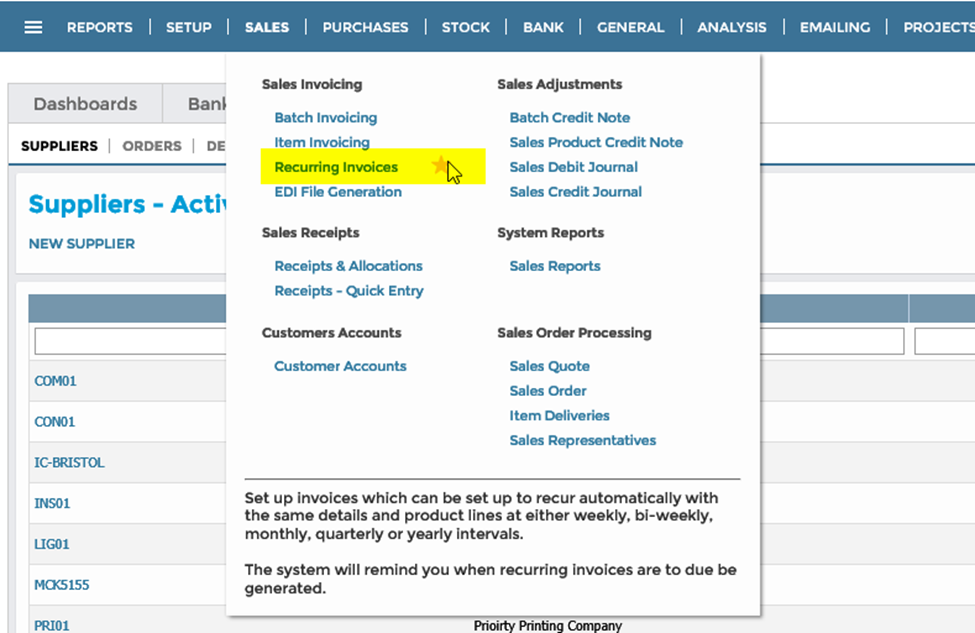
- Main Menu: This has dropdowns with a complete range of features.
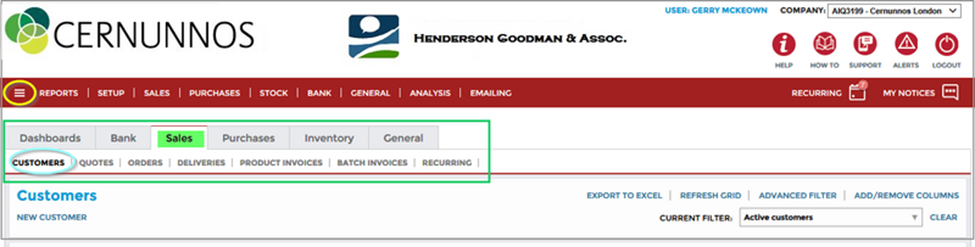
- Tab menu: This lets you access all the main grid listings.
Favourites
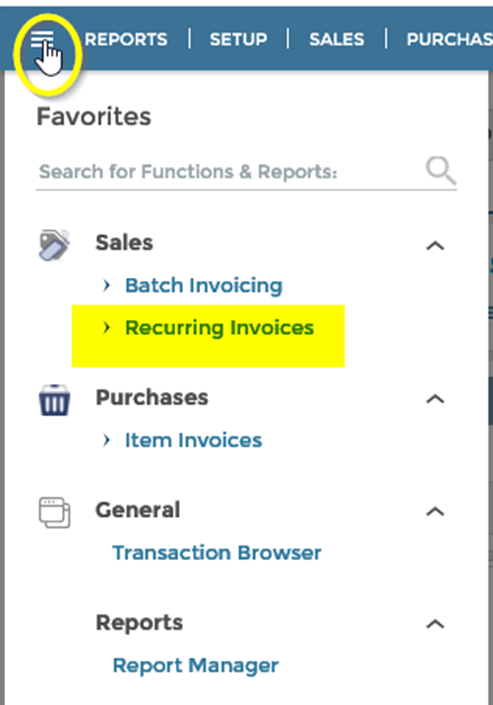
- To add a favourite to the menu, hover near your chosen menu option and click the star that appears.
- To access your favourites, click the menu bars.
Menu Access
For both menus, you will only see the functions which are relevant to your specific role and its related activities. This is controlled in the administration layer.
See:
 AIQ Group Admin Layer (1.2) - AIQ Academy
 Company General Overview (1.3) - AIQ Academy
 Use of Tabs vs Menu Bar (1.4) - AIQ Academy


Grid Listings
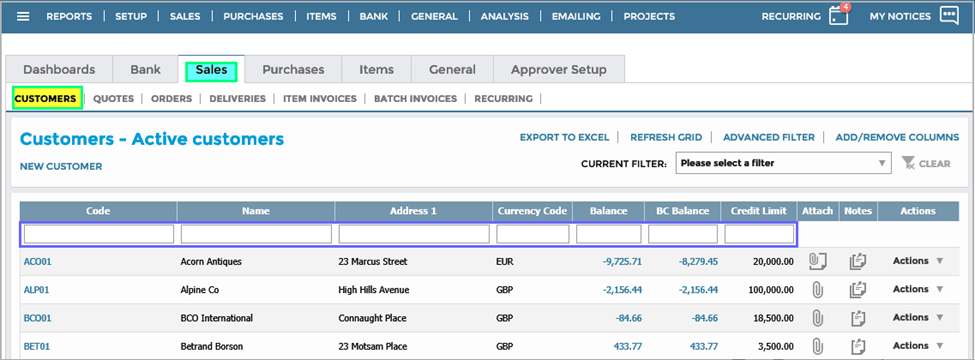
In the grid listings, you can access any of the modules’ Master Records and transactions.
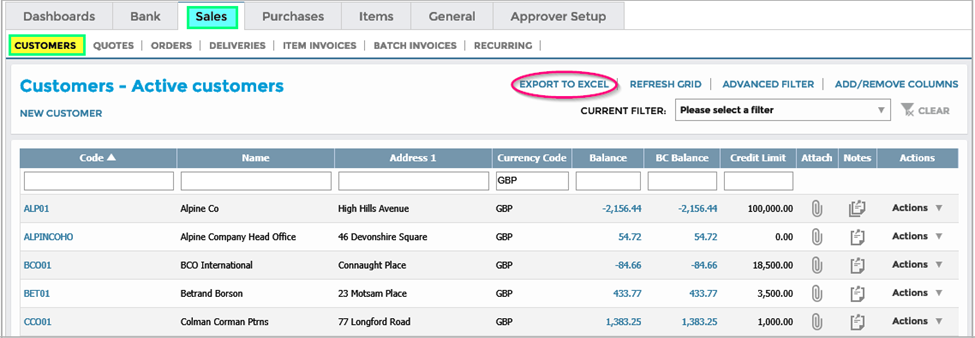
For example, when you go to Sales > Customers, the system returns a list of Customers in the Sales system. You can then use filters and layout options to create and save your personal view of the Customer listing grid.
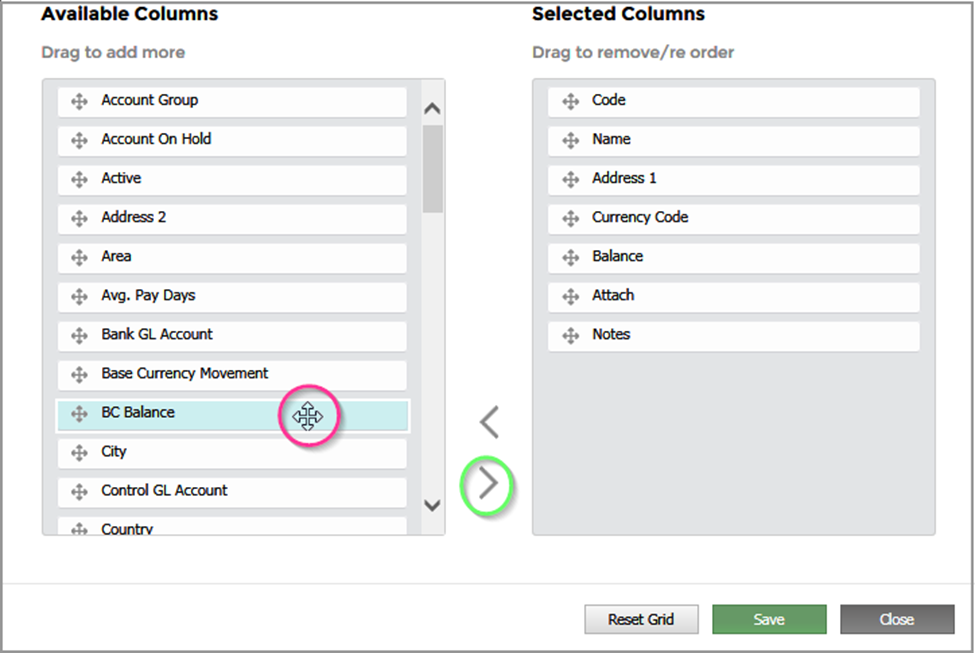
Adding or Removing Columns
This example shows the Customer listing grid under Sales > Customers:
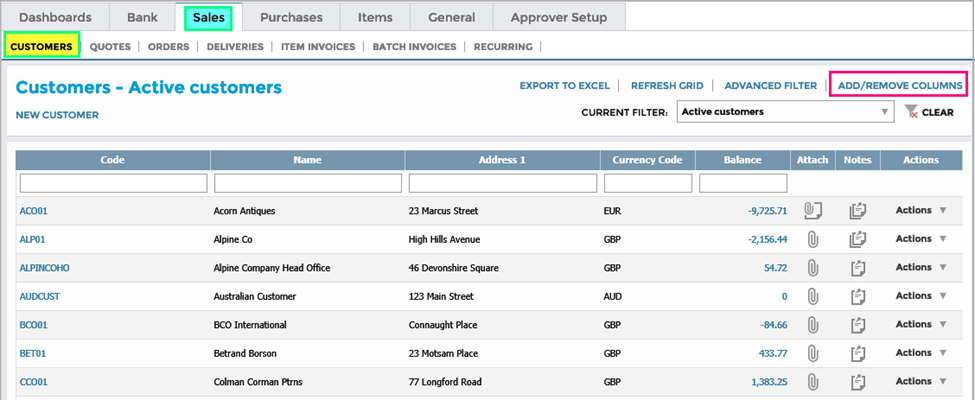
- Click Add/Remove Columns.
- Drag the column labels to either Available Columns or Selected Columns.
- You can re-arrange the order of the columns in Selected Columns by dragging the fields to the desired location.
- Click Save. Each of the modified grids is remembered so on login you will see your grids. This means, for example, the Credit Controller can have a completely different view of the Customers’ accounts than that of a Salesperson.
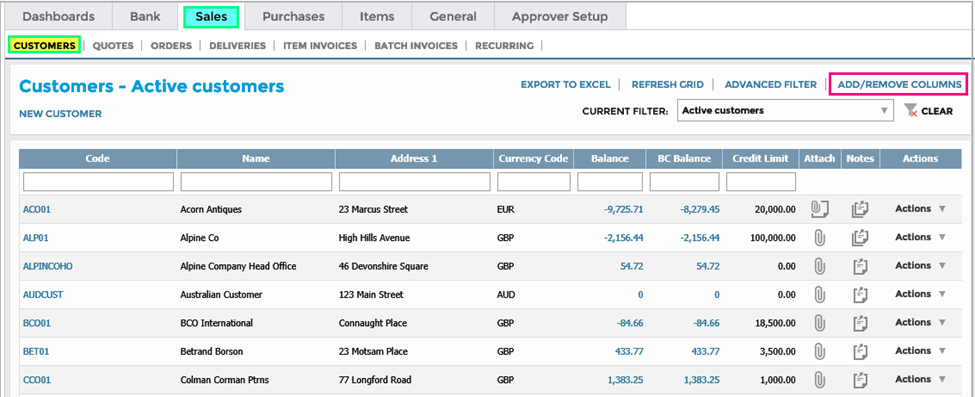
Here we’ve added the BC Value and the Credit Limit as two new columns in the Customer listing grid:
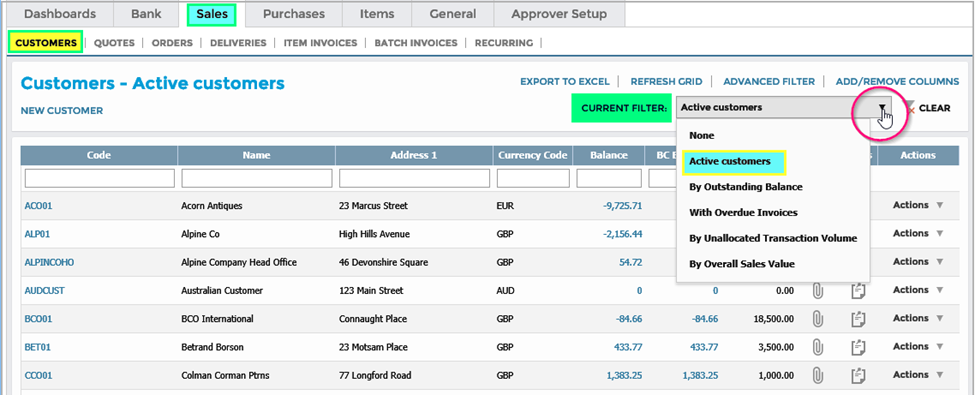
Using Current Filter
You can use filters to refine your list of Customers by selecting from the Current Filter dropdown:
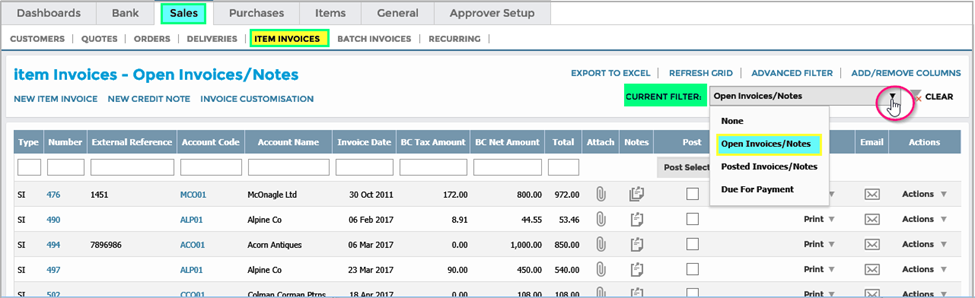
Each grid has its own set of filters. Here, for example, are the filters for the Customer Invoices:
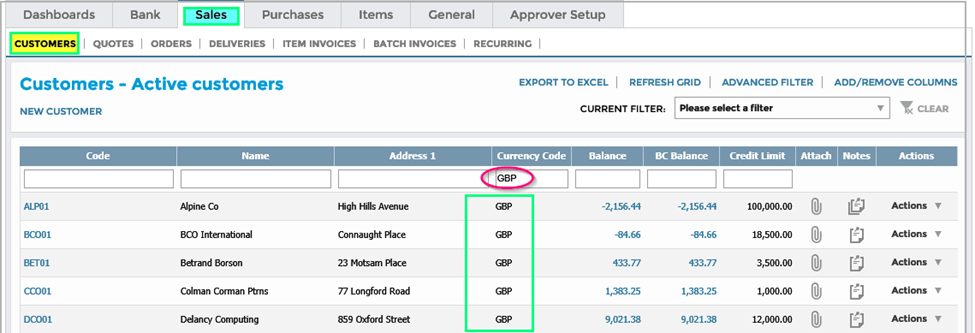
Using Freeform Filter Fields
You can use the filter fields at top of your (now modified) listing grid:
For example, under Currency Code, enter 'GBP' to display just those Customers with GBP as their Currency Code:
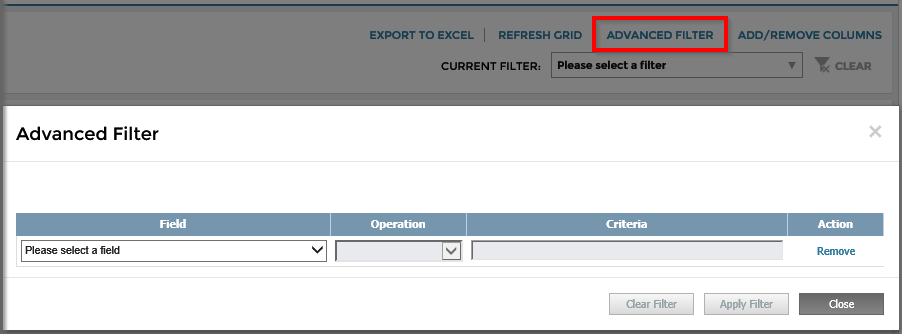
Using Advanced Filters
- For compound filtering, click Advanced Filter. The options available depend on the grid:
- Here, in the Customer Invoices grid, we are selecting 'Avg. Pay Days' 'Greater Than' '50' as the first filter of the compound filter:
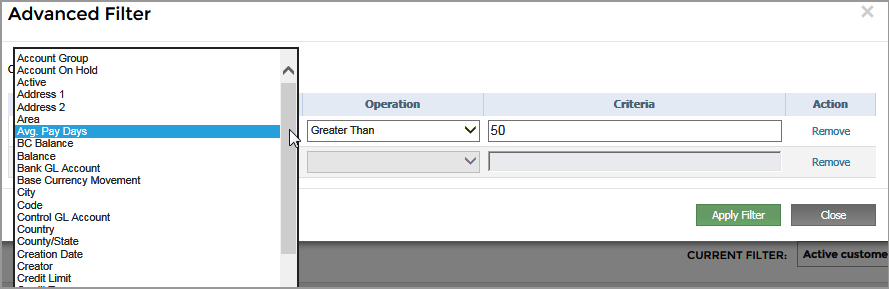
- Here we are selecting the second filter of 'Account On Hold Equal Not On Hold'.
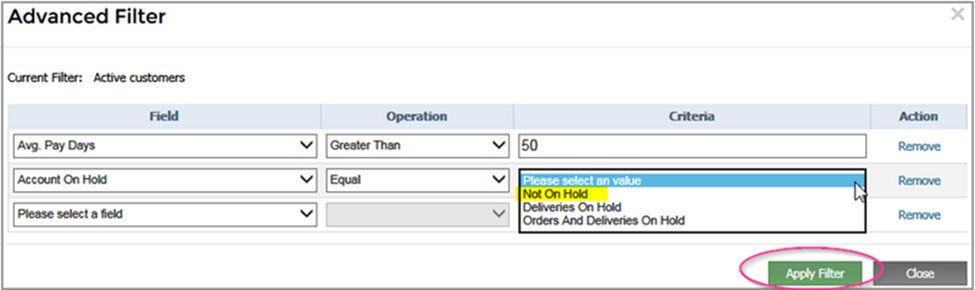
- When you have finished adding conditions (all of which are of 'AND' type), click Apply Filter to view the results.
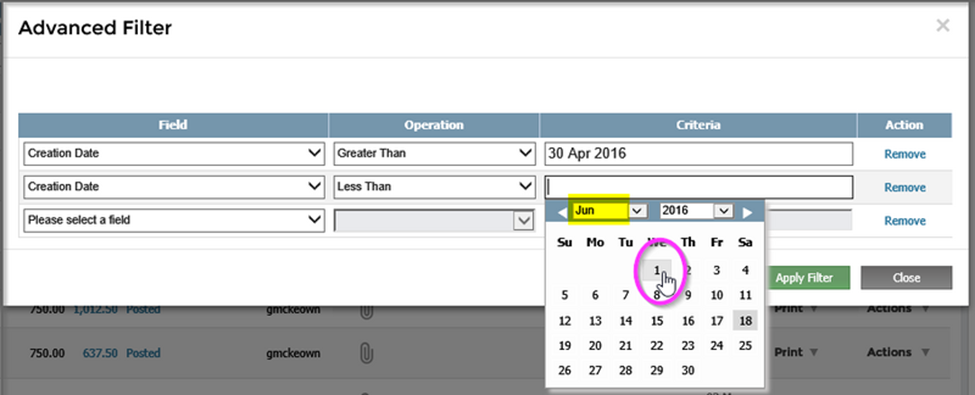
Similarly, we can use the advanced filter, to find a set of Invoices from a particular day or month, using 'Creation Date', 'Less Than' or 'Greater Than', and the date:
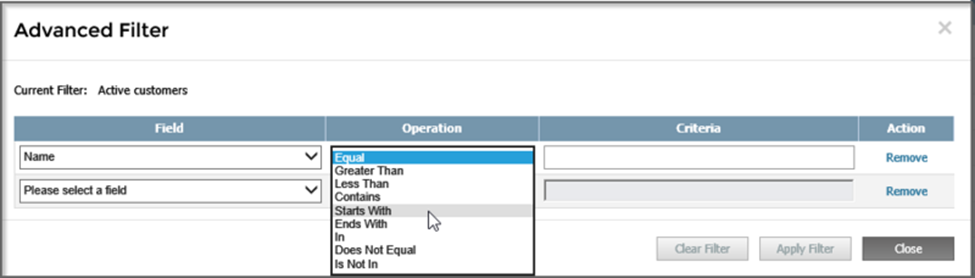
Or in the Customer Grid, to find a particular Account, using 'Name', and the relevant criteria:
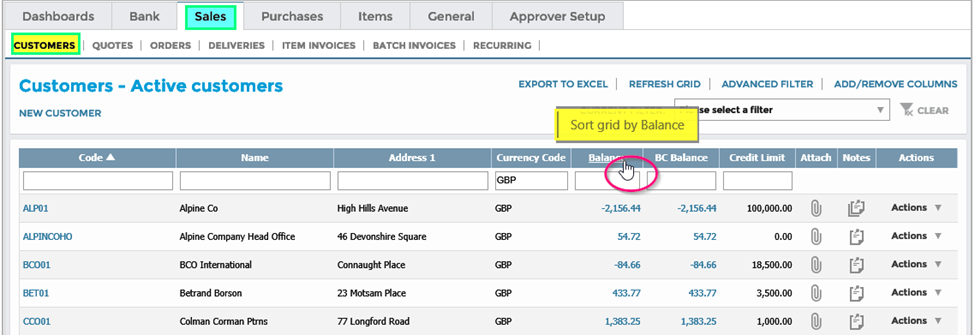
Sorting the Listing:
You can sort the grid by clicking on any of the column headers. Click once for an ascending sort (lowest value first) and click again for a descending sort (highest value first).
Exporting a Report of the Listing Grid
After manipulating the listing grid using, you can export the it to Excel by clicking Export to Excel.
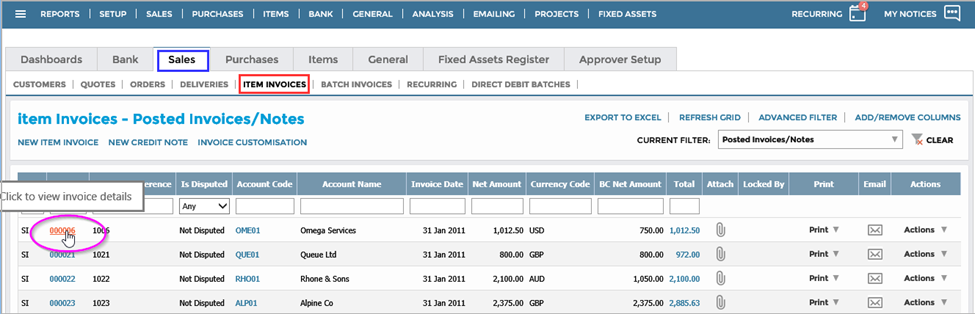
Drilldown Access
Accessing Drilldowns
For drilldown access in the grid listings, click any of the blue links:
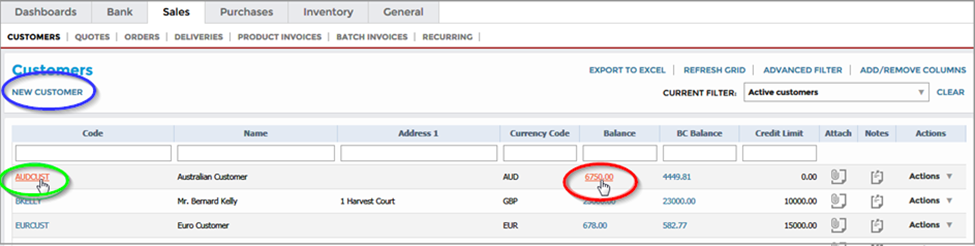
For example:
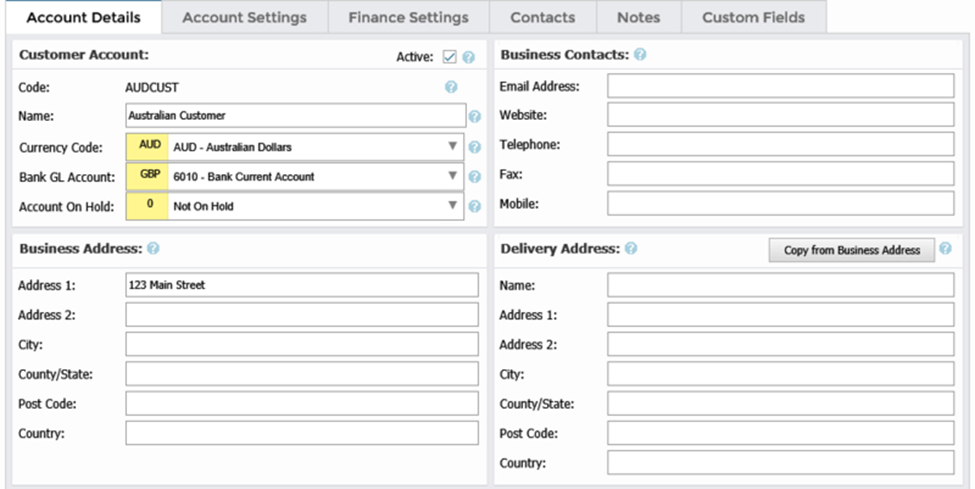
- In the Code column, click the Customer’s Account Code to open their Master Record and, if needed, add, or amend any data.
- In the Balance column, click the Customer’s Balance to examine the Customer’s Account and Transactions.
Customising Drilldown Screens
Customise the Customer Transactions screen layout by:
- Click Grid Options > Customise Grid.
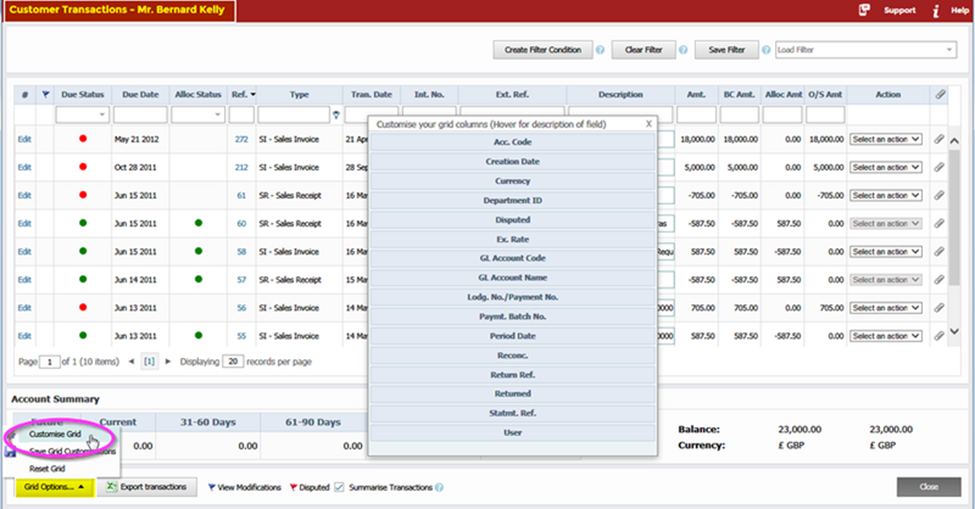
- Drag and drop the column you want to include between any two existing columns. The example shows the Ex Rate column being dragged and dropped between the Amount and Base Currency Amount columns.
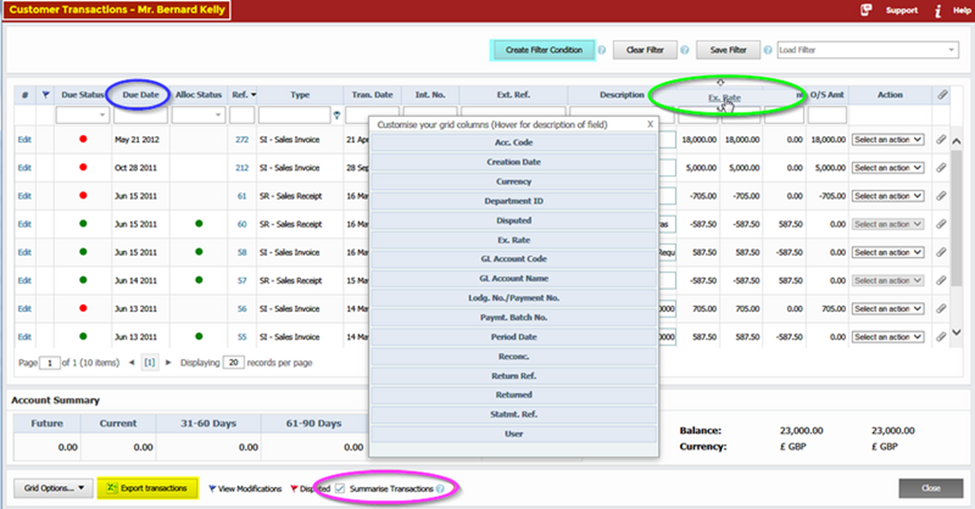
- Click Save to retain these changes against your User Profile. These modifications will not affect other users.

Resizing Screens
If needed, you can resize most windows by dragging them from the corner using the arrows that appear: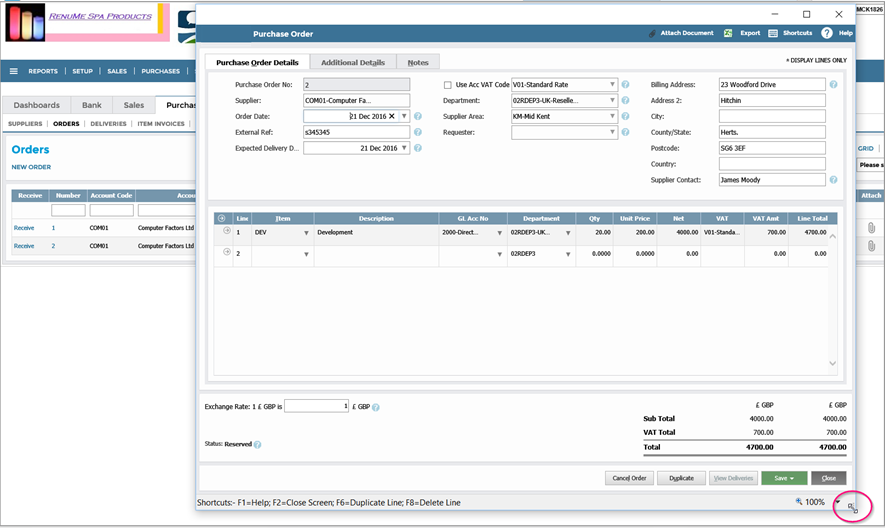
Filtering, Viewing, and Editing Transactions
Filter, sort, and export in the Customer Invoice Transaction screen (or any other drilldown screen), following the instructions in the Grid Listings section above.
- Use the column filters to get quick access to a subset of Invoices Due for Payment or, in the case of Purchase Invoices, Invoices that have been Rejected by the Approver and the Supplier needs to be informed.

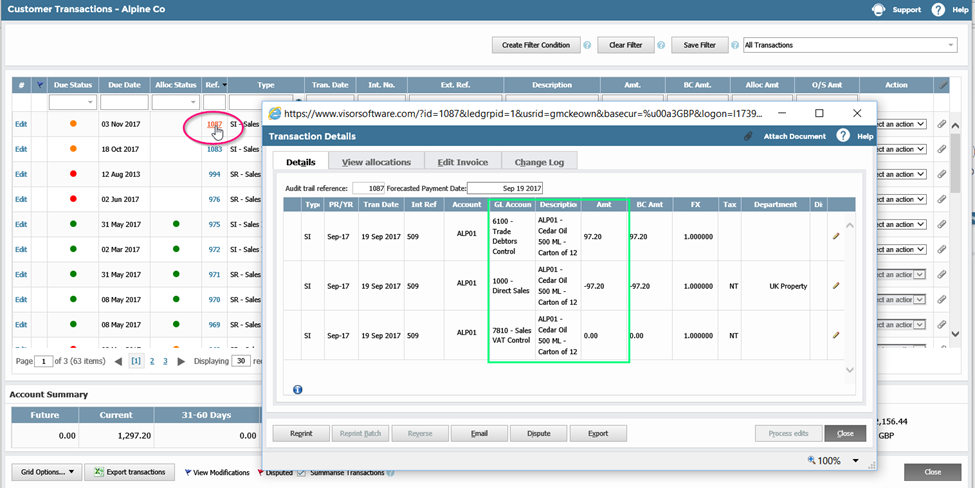
View the individual General Ledger Postings for each Invoice, Receipt, etc. in the Transaction Details screen by unticking Summarise Transactions and clicking the relevant Ref:
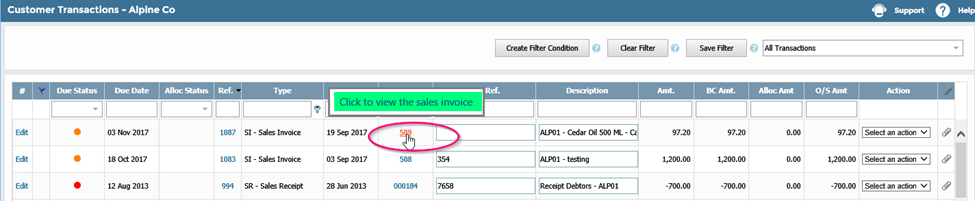
Open the Invoice by clicking Int. No. If the Invoice is unposted, then you can modify it and add more Invoice Lines.
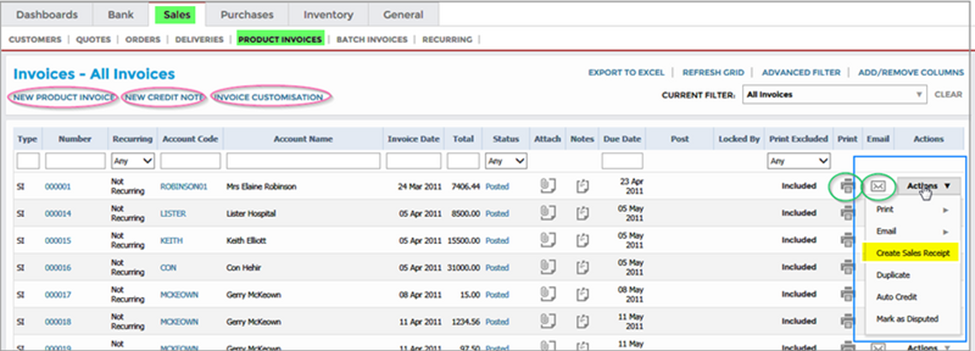
Actions
Listing Grid Actions
All the listing grids have an Actions dropdown:
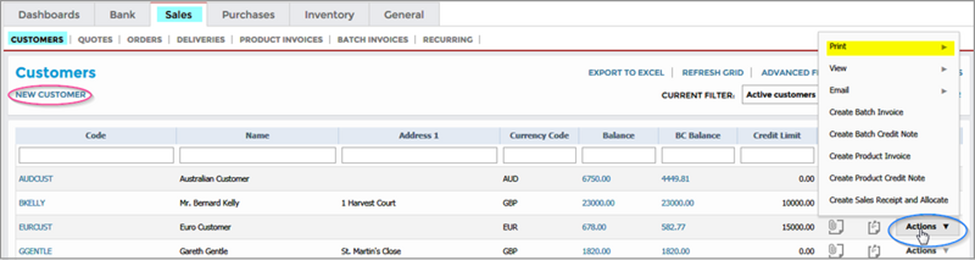
In the listing grid, some of the columns have two levels of dropdowns, such as:
- Print
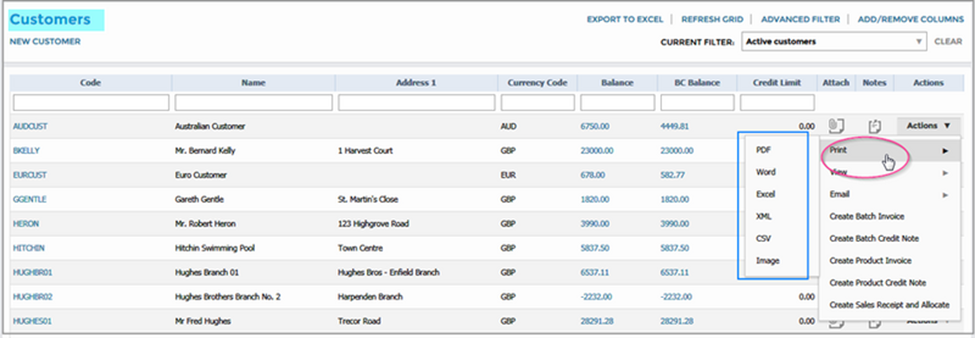
- View
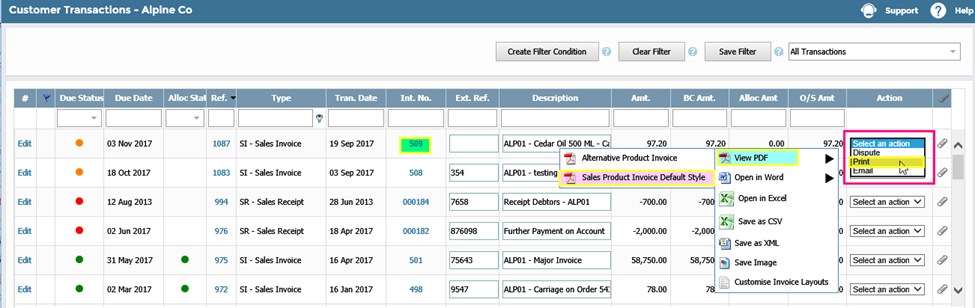
Drilldown Screen Actions
The drilldown screens also have Action dropdowns.
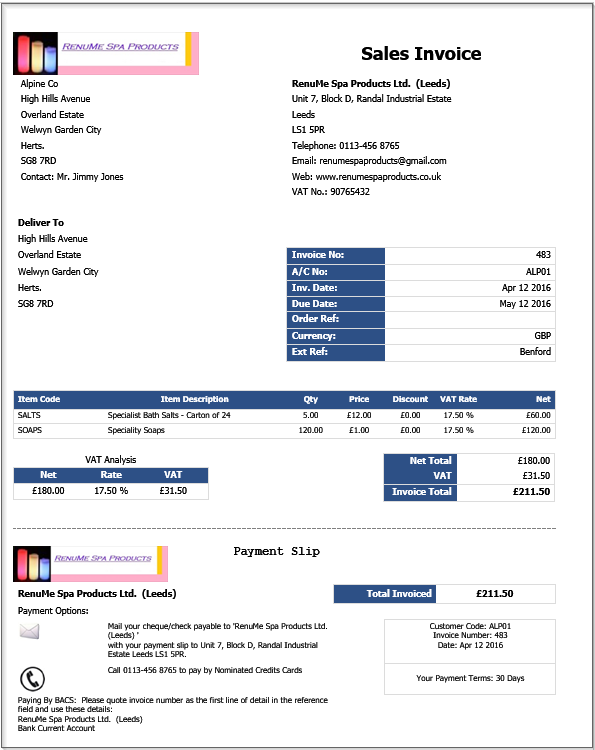
- In Print > View PDF > Sales Product Invoice Default Style, you can choose to print an Invoice from any time:
All the other modules (Sales, Purchases, Bank, etc.) have similar functionalities, relating to their transaction types:
-
Sales > Product Invoices > Actions > Create Sales Receipt lets you create and allocate a Sales Receipt against the Invoice in question. All the relevant details from the Invoice are automatically populated in the receipt.
When you click Sales > Customers > Actions > Create Product Invoice, the details for the selected Customer will automatically appear in the Invoice module.
Dropdowns
Dropdowns let you complete a field by selecting from a list of entries. For example, the Supplier (Vendor) dropdown lists all the Suppliers (Vendors) that you have set up by Code sequence.
- To change the sort order of the dropdown list, click the relevant header or double-click to change back again.
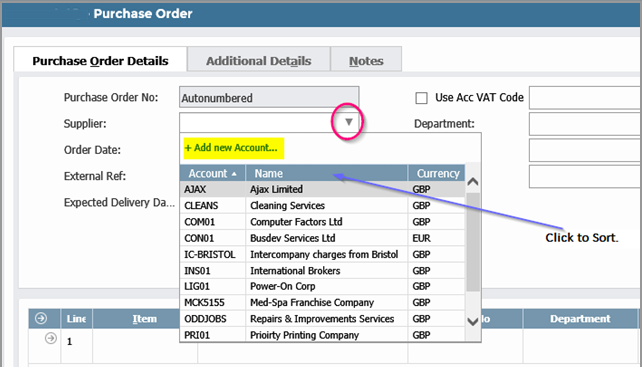
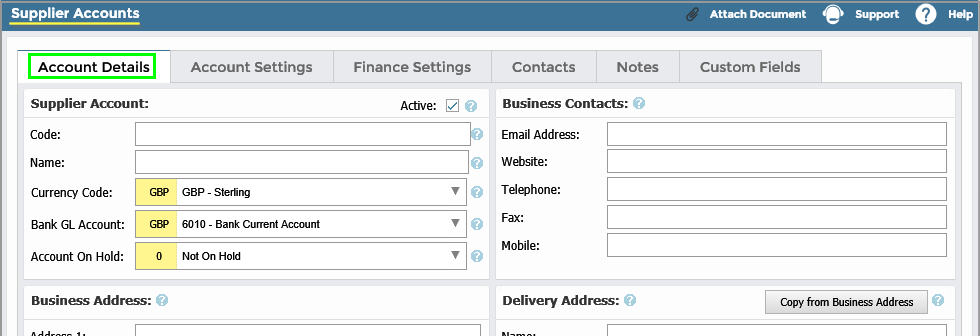
- If the entry you want is not present in the list, in the dropdown click + Add new Account. This lets you update the list without closing your work. The relevant account maintenance screen will appear in an overlay window where you can add and save the missing entry.
Locking and Unlocking Transactions
When you open a Transaction, it gets locked automatically so that no other user can access that transaction while you are still working on it.
The Locked By column will have the users name while the transaction is locked:
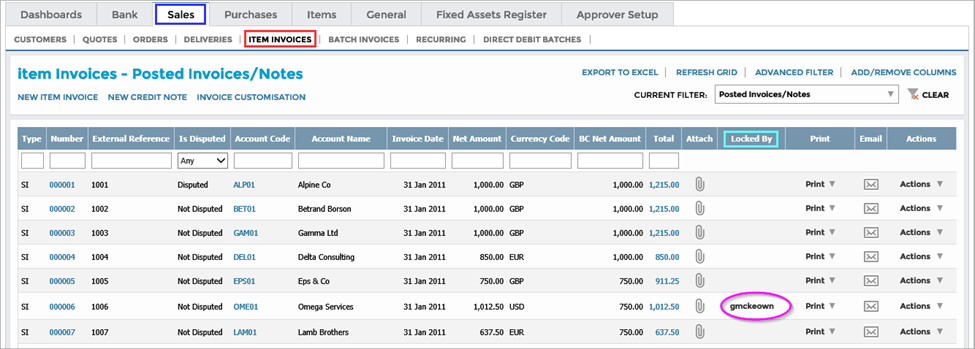
When you close or save the transaction, the lock will be released. You can also unlock the transaction yourself by clicking your name in the Locked By column, followed by OK:
