Introduction
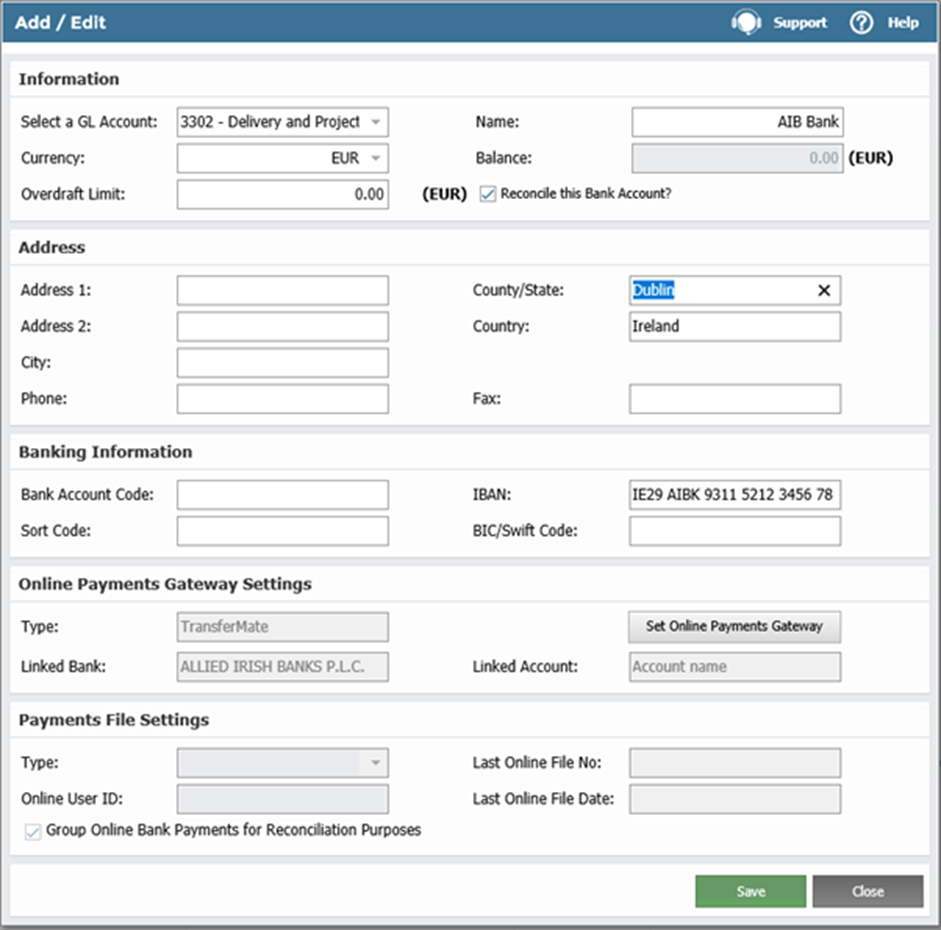
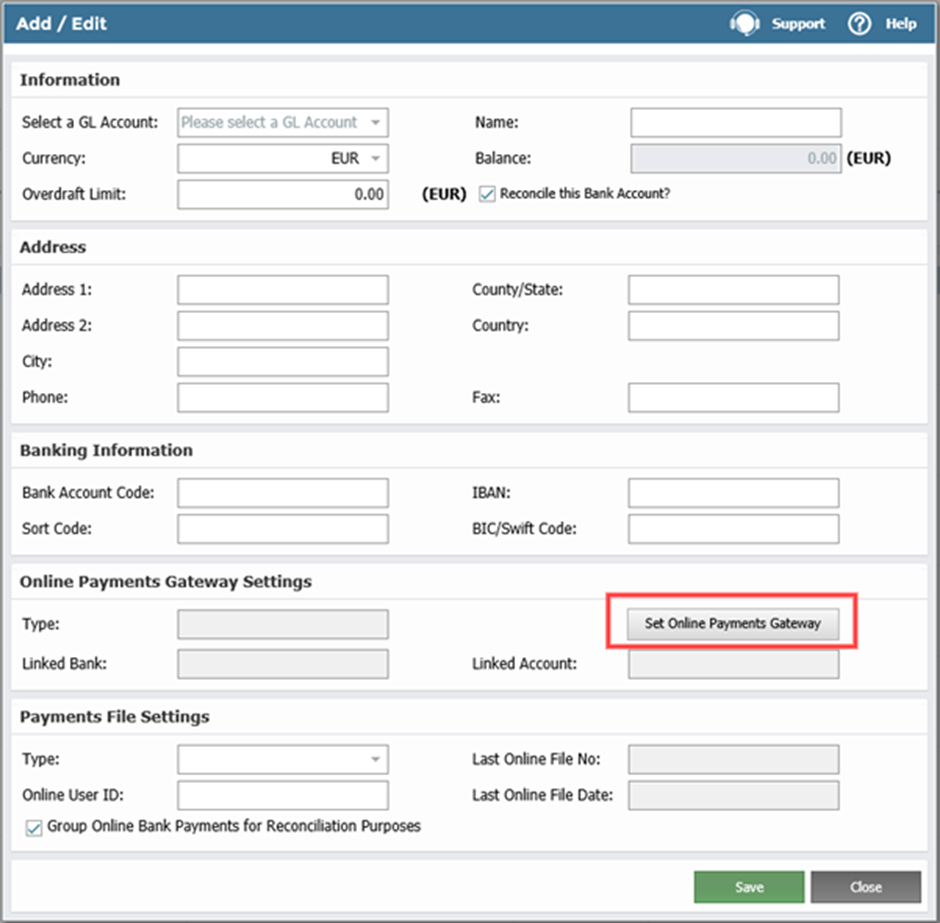
This facility lets you create new Bank accounts or edit the details of existing bank accounts, including contact information and e-banking references. As a prerequisite to setting up a new bank account, first set up a General Ledger Control Account Code for your new Bank Account. This account will hold the Bank Balance and associated transactions.
See:
 Managing General Ledger Accounts
 Processing Foreign Supplier Payments using TransferMate
Setting up a Bank Account
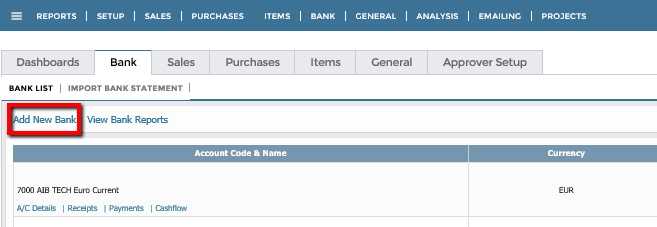
- Go to the Bank > Bank List > Add New Bank.

- In the Add/Edit screen, go to Select a GL Account. In the dropdown, click Create a new GL Account. This opens the General Ledger Maintenance screen.
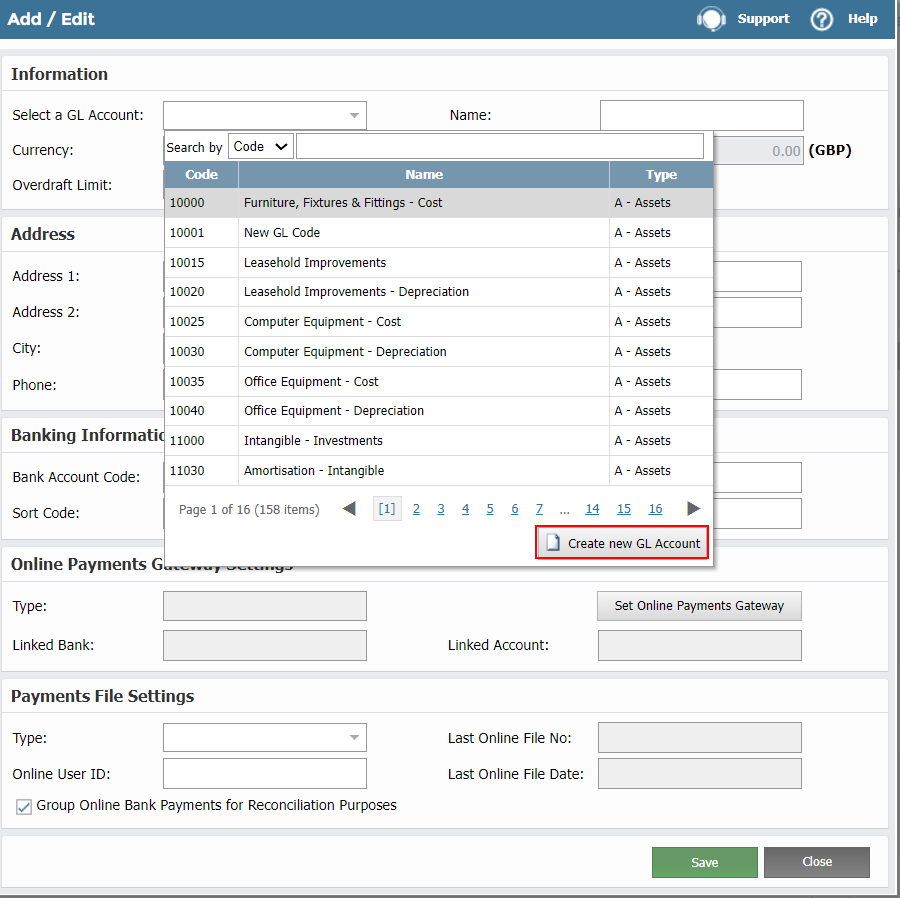
- Enter your General Ledger Code and select your General Ledger Category and Sub Category.

- Click Process to save this new General Ledger Account. It will automatically become your new bank account.
Editing Bank Account Details
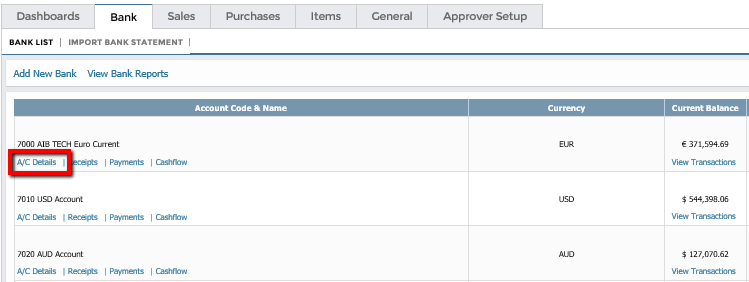
In the Bank List grid, click A/C Details under Account Code & Name.
Setting up a TransferMate Bank Account
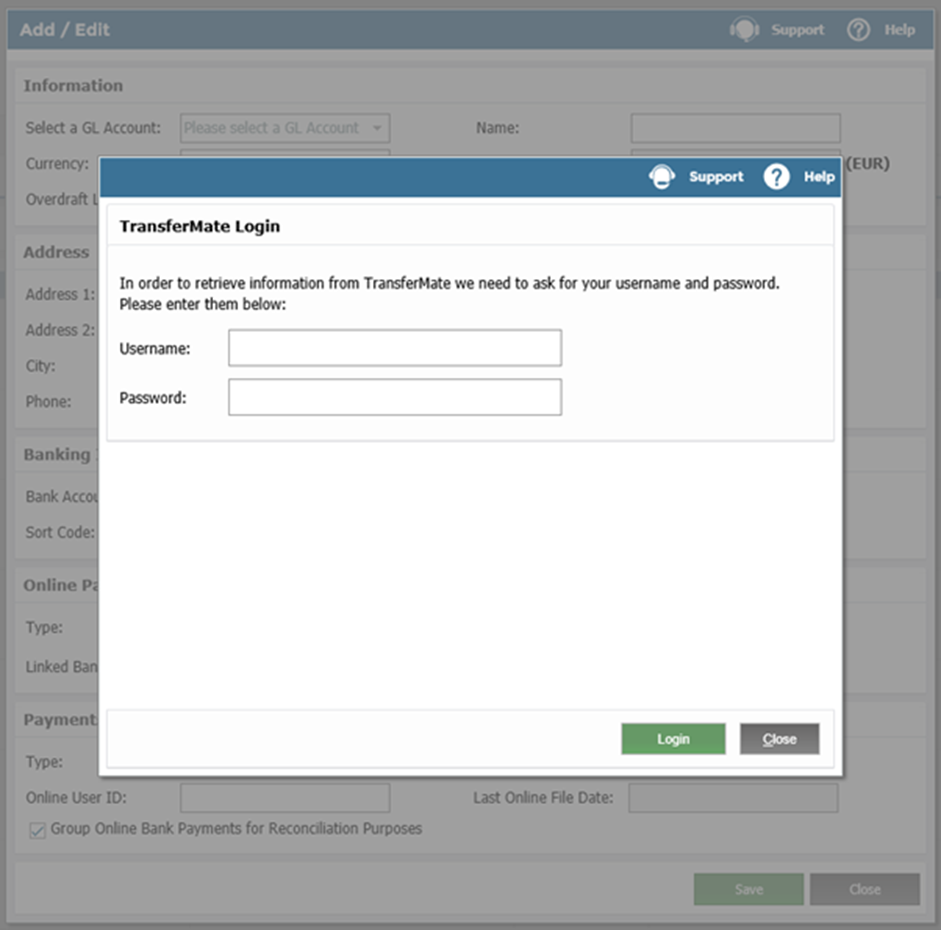
A TansferMate Bank Account can be used to process payments to foreign suppliers. You will need your TransferMate username and password during this process. For more details, see Processing Foreign Supplier Payments using TransferMate.
If you want to use TransferMate in Bulk Payment, see Creating New Bulk Payments and Using Bulk Payment Approval.
As when setting up regular bank accounts:
- Create a GL Account for the new TransferMate account.
- Go to Bank > Add New Bank to create a new bank account. Select the GL account you just created and add a name for the new TransferMate account (this could be just 'TransferMate').
-
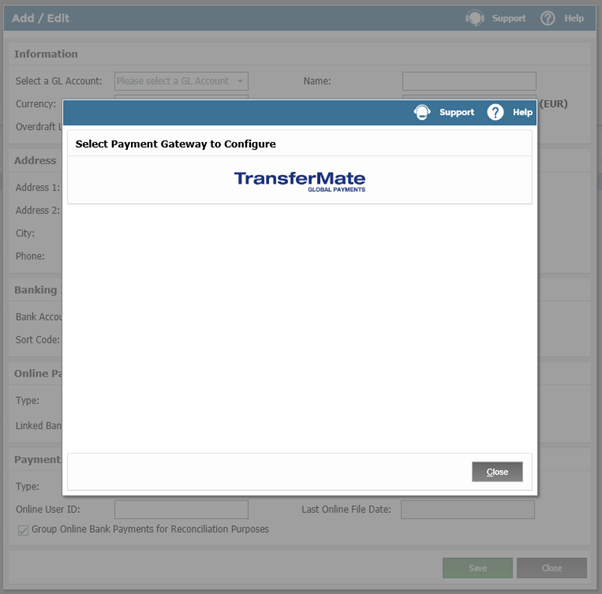
- Under the Online Payments Gateway Settings section, click Set Online Payments Gateway. If you cannot see the Online Payment Gateway, please contact support at support@accountsiq.com and request to have it set up.

- Click the TransferMate logo.
- Enter your new TransferMate login details (provided when you signed up for the service) and click Login.
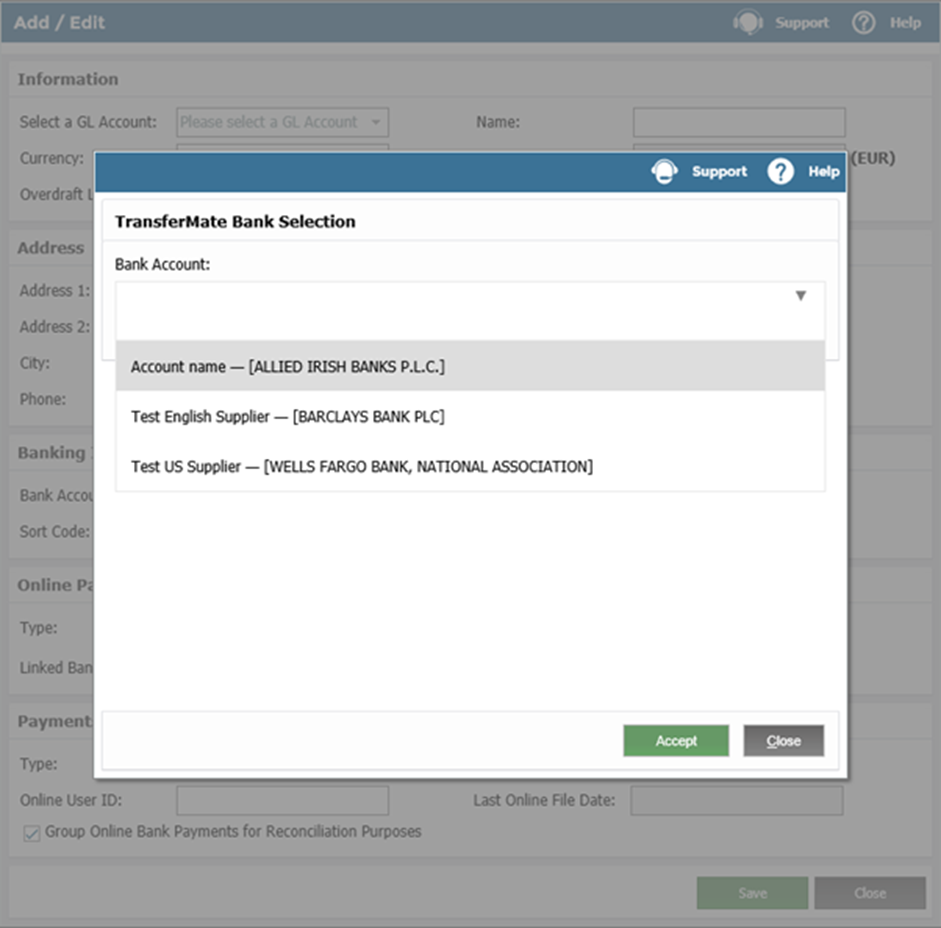
- After authentication via the TransferMate portal, select which bank account you wish to use to settle the cost of any FX payments runs. Click Accept. This links your new TransferMate bank account to the associated account on the TransferMate portal.
- Back in the bank setup screen, click Save to create a new account in the system