
Introduction
If you don't have the new Mileage Expenses module and are interested, please contact support@accountsiq.com to get started.
Prerequisites
Before you can use the mileage module, ensure the following:
Employees and expense categories are set up in the expense module.  Setting up Employee Expenses
Approvers are set up. Purchase Approval for Budget Holders
Employees are linked to the mobile app. Using the mobile Employee Expenses App (Employees)
In Maintain Menu Profiles, both Expense Items and Employees are checked in the Expenses section. Setting up and Administering Group and Entity Users
Mileage Setup
To set up employees for mileage expenses, you must do the following:
- Add the Vehicle Types.
- Set up the Expenses Tax Year end.
- Set up the Mileage Bands.
- Associate a Vehicle Type with an employee in their expenses record.
See:
 Setup Mileage Expense module (21.5) - AIQ Academy
Add, Edit, or Delete a Vehicle Type
Add a Vehicle Type
- Go to Setup > Codes Maintenance > Vehicle Types.
- Complete the following:
-
Code (Mandatory): Enter a unique code for the vehicle type, 50 characters maximum.
-
Description (Mandatory): Enter a description for the vehicle type, 250 characters maximum.
-
Active: This is checked by default. Uncheck to deactivate the vehicle type.
-
Created By (Read-only): This automatically displays the name of the user that created the vehicle type.
-
Code (Mandatory): Enter a unique code for the vehicle type, 50 characters maximum.
- Click Save.
Edit a Vehicle Type
- Go to Setup > Codes Maintenance > Vehicle Types.
- Click Edit next to the relevant entry.
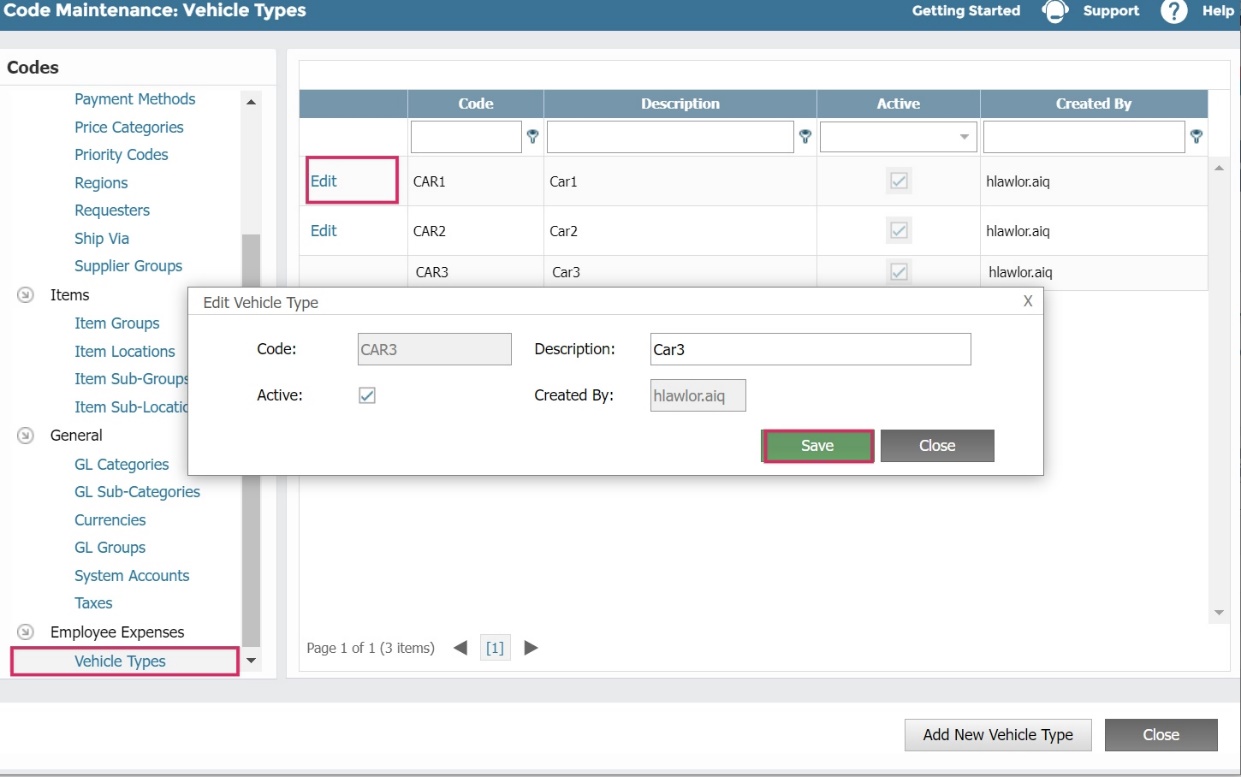
- Make the relevant permitted edits.
- Click Save.
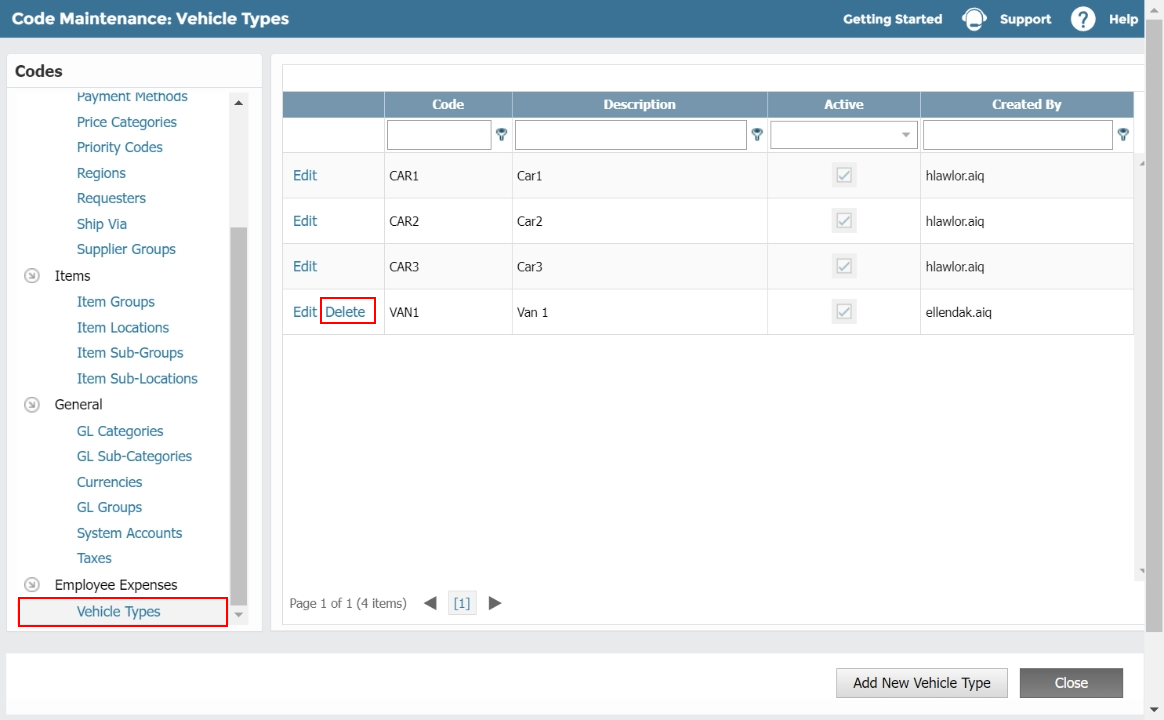
Delete a Vehicle Type
Only vehicle types with no employees associated with them will have a deletion option.
- Go to Setup > Codes Maintenance > Vehicle Types.
- Click Delete. A confirmation notification will appear to confirm the deletion of the Vehicle Type.
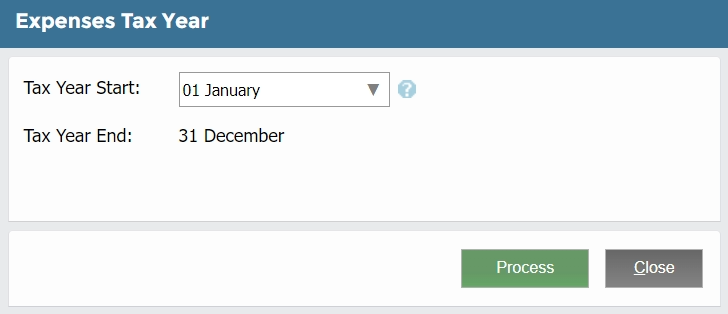
Set Up the Expenses Tax Year
The cumulative mileage bands are zeroized at the end of the tax year. By default, the tax year is the same as the company’s financial year, but you can change this if there are no submitted expense claims against that year.
- Go to Employee Expenses > Expenses Categories > Expenses Tax Year.

- If valid, you can amend the tax year.
- Click Process.
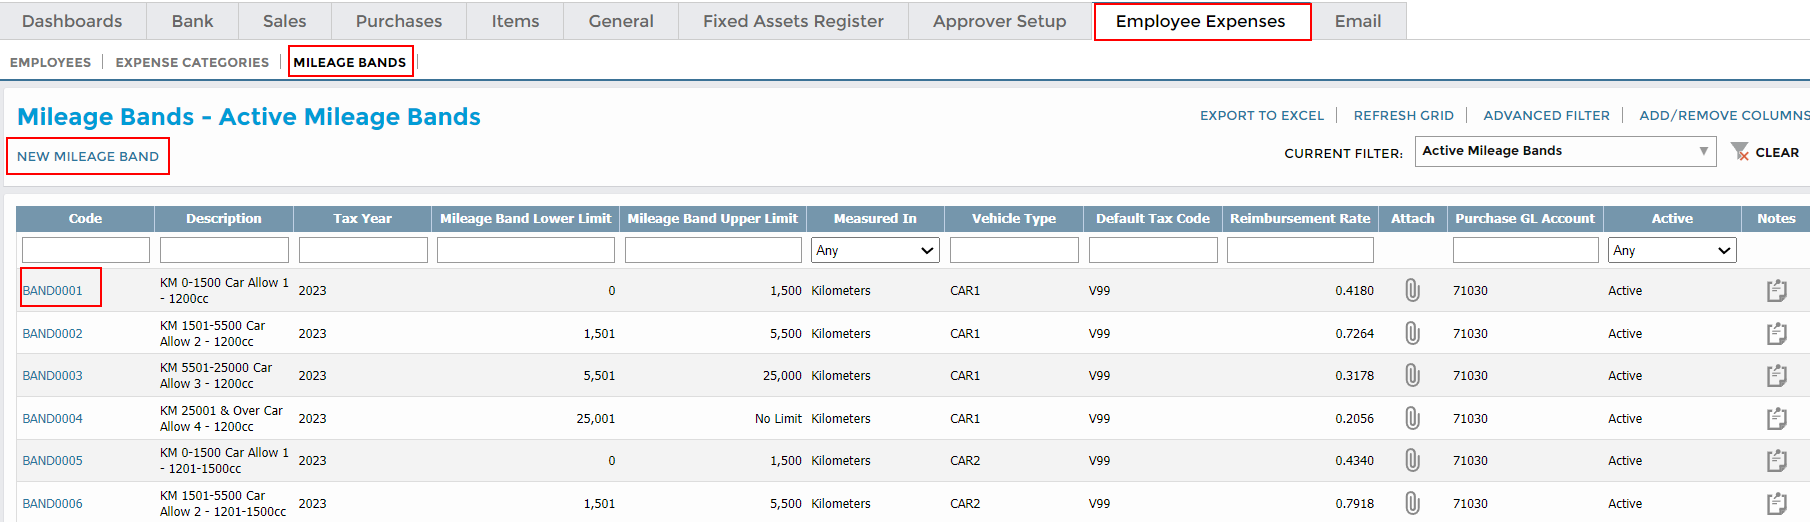
Set Up and Maintain Mileage Bands
Creating a comprehensive Mileage Band range
When setting up mileage bands you need to make sure that for a given tax year and vehicle type, the mileage bands cover the entire range, from 0km to infinity.
See an example setup:

Add a Mileage Band
Only users with access to Expense Items in Maintain Menu Profiles will have access to Mileage Band Listing and Maintenance.
See: Setting up and Administering Group and Entity Users
- Go to Employee Expenses > Mileage Bands > New Mileage Band or click on the relevant mileage band code to open it.
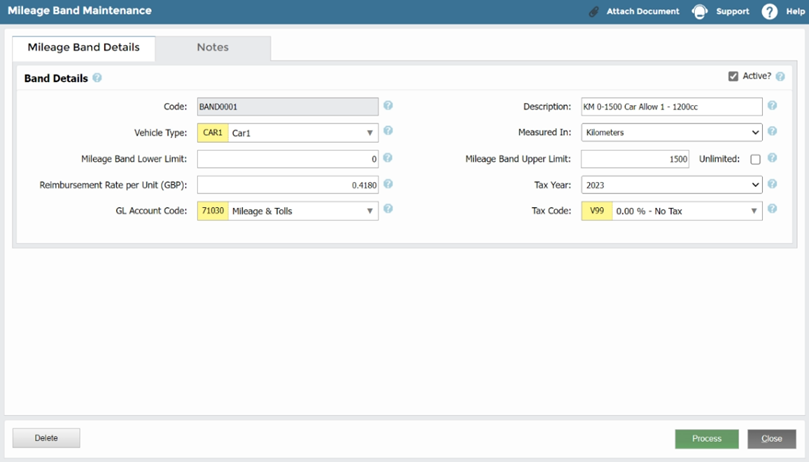
- Complete the following fields:
-
Code (Mandatory): Enter a unique code, maximum 50 characters.
-
Description (Mandatory): Enter a description, maximum 250 characters.
-
Vehicle Type: Select a vehicle type already set up or click +Add new Vehicle Type to add one now.
-
Measured In: Select either kilometers or miles. A single company must use the same measurement system for all its mileage expenses.
-
Mileage Band Lower Limit: Enter a number, maximum 18 characters.
-
Mileage Band Upper Limit: Enter a number, maximum 18 characters.
-
Reimbursement Rate Per Unit (Mandatory): Enter a number up to four decimal places, maximum 18 characters for the per base currency unit reimbursement rate.
-
Tax Year: Enter the tax year for this mileage band.
-
GL Account Code: Enter the associated GL Account Code or create a new tax code by clicking +Add new GL Account.
-
Tax Code: Enter the associated Tax Code or create a new tax code by clicking +Add new Tax Code.
-
Code (Mandatory): Enter a unique code, maximum 50 characters.
- Click Process.
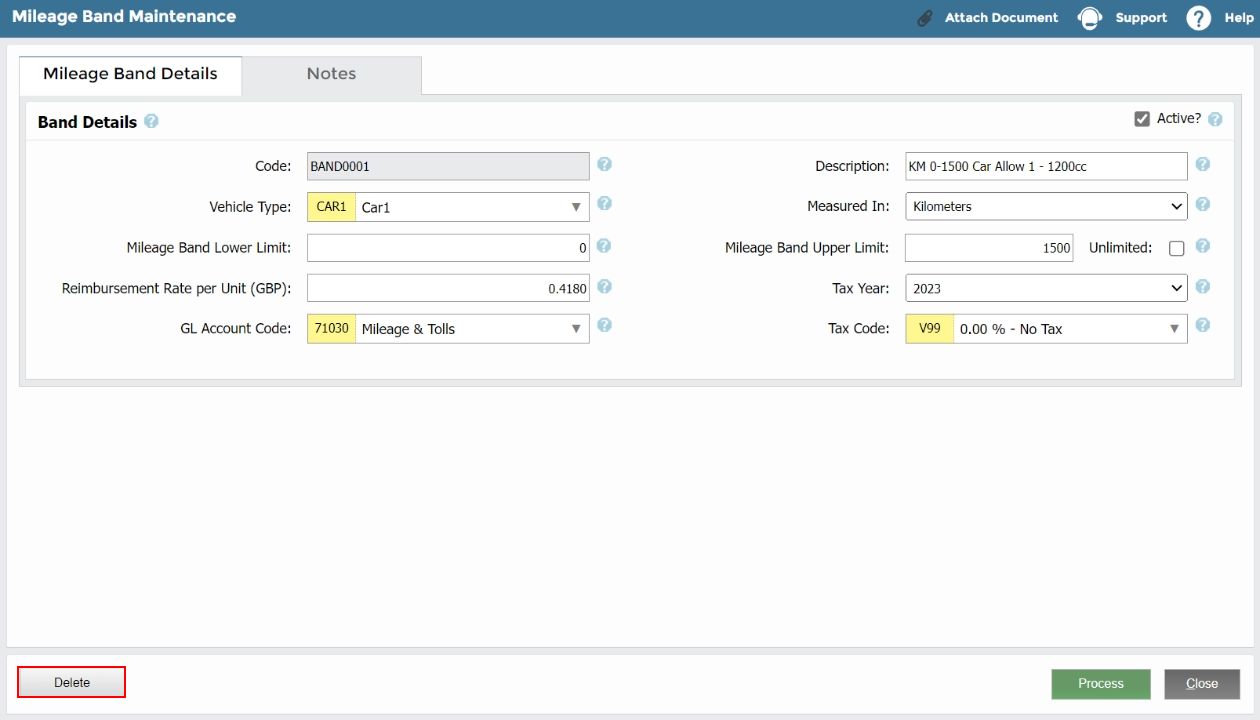
Delete a Mileage Band
If the mileage band has not been used, the Delete button will be available. You will receive a notification on successful deletion.
Manage Mileage Band Listings
Go to Employee Expenses > Mileage Bands.
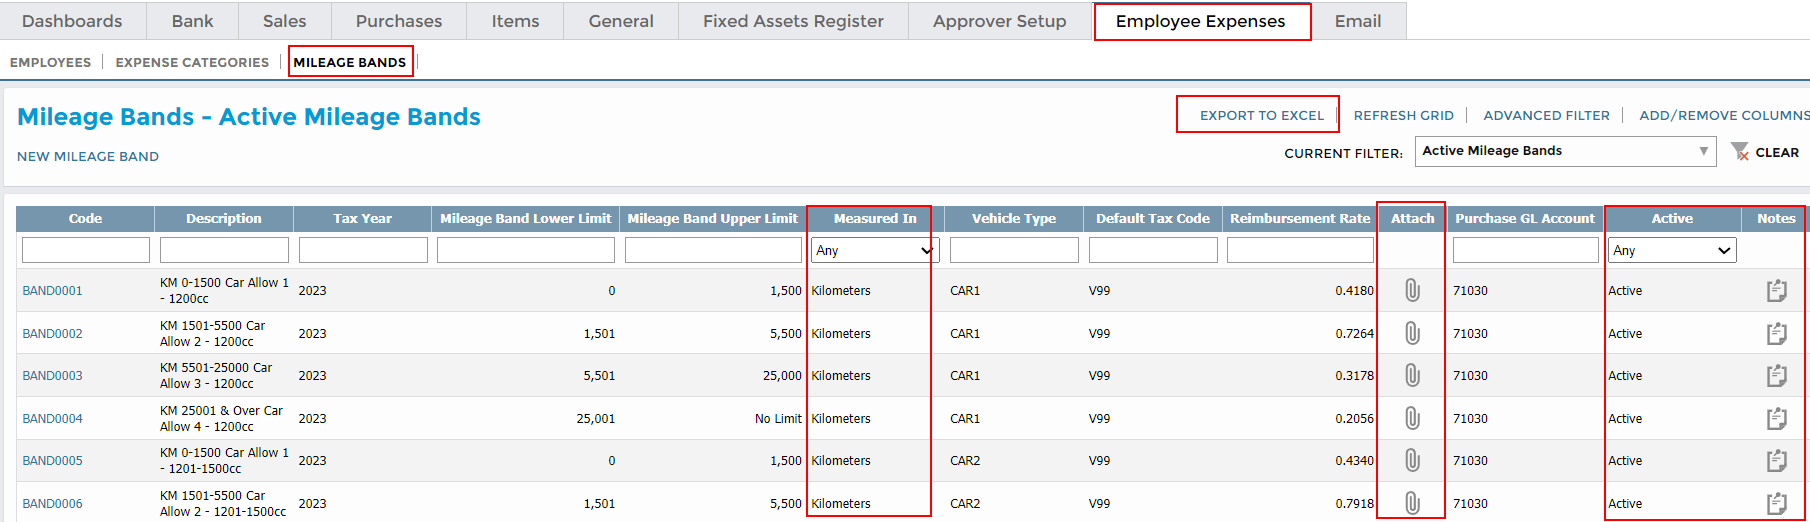
Filter Listing Grid
- Filter Measured In and Active using the dropdowns.
- Use search boxes for the other columns.
- Sort columns in ascending or descending order.
Add an Attachment to a Mileage Listing
- Click the paperclip icon.
- Go to Browse, find the relevant file, then click Upload File. Add comments, as necessary.
Attach a note to a Mileage Listing
- Click the note icon.
- In the screen, click Add New Note, enter the note, and click Save. Existing notes can also be edited.
Export a Mileage Band Listing to Excel
- Click Export to Excel to produce a CSV file containing all the data from the Mileage Band Listing.
Manage Employee Expense Categories
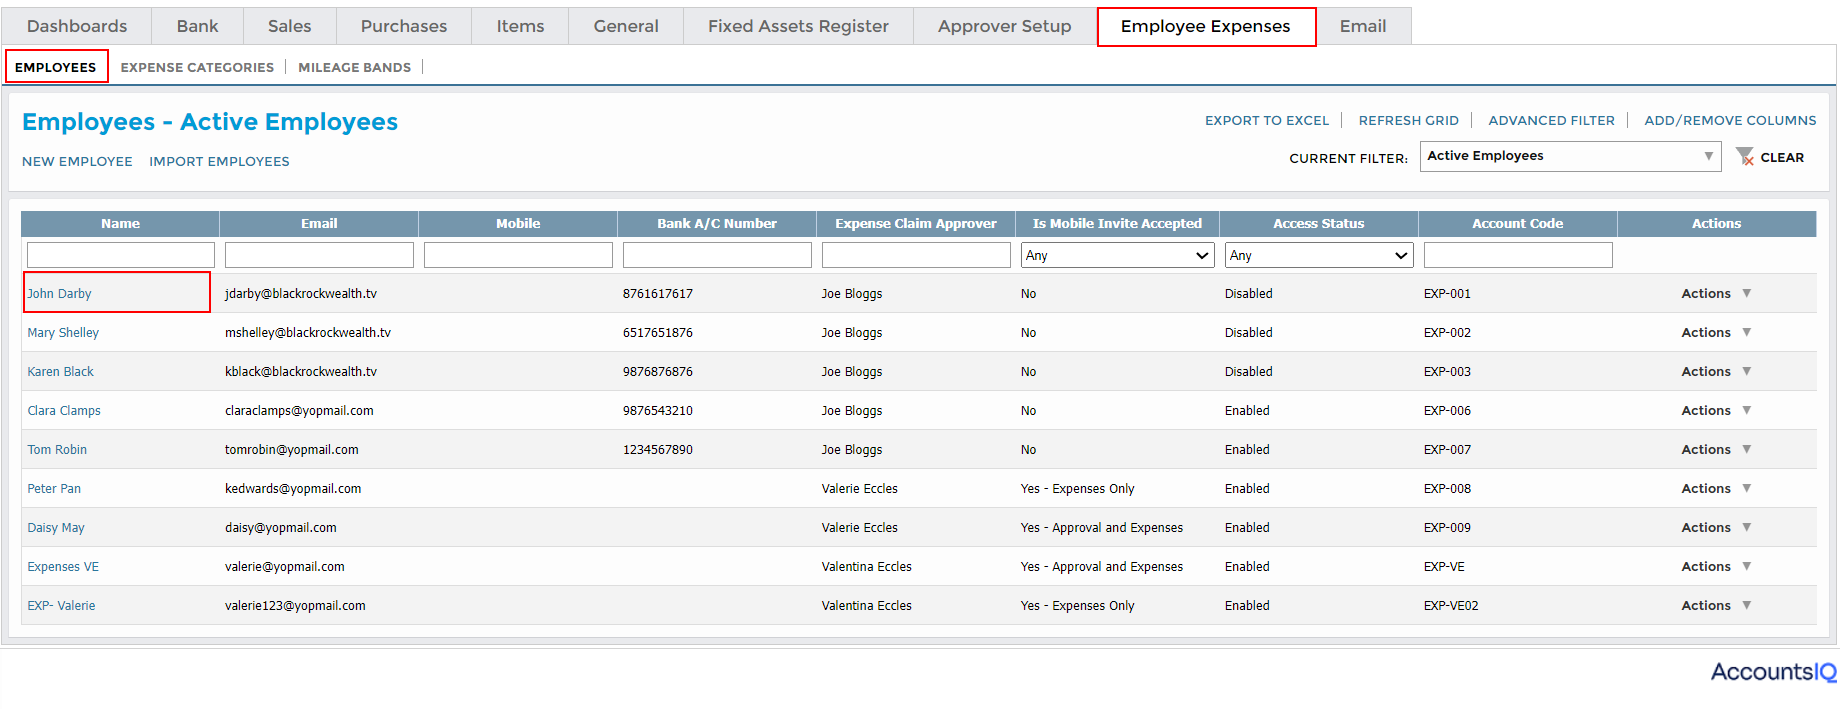
Open an Employee Expenses Record
- Go to Employee Expenses > Employees.
- Click on the relevant name in the listing grid to open the record.

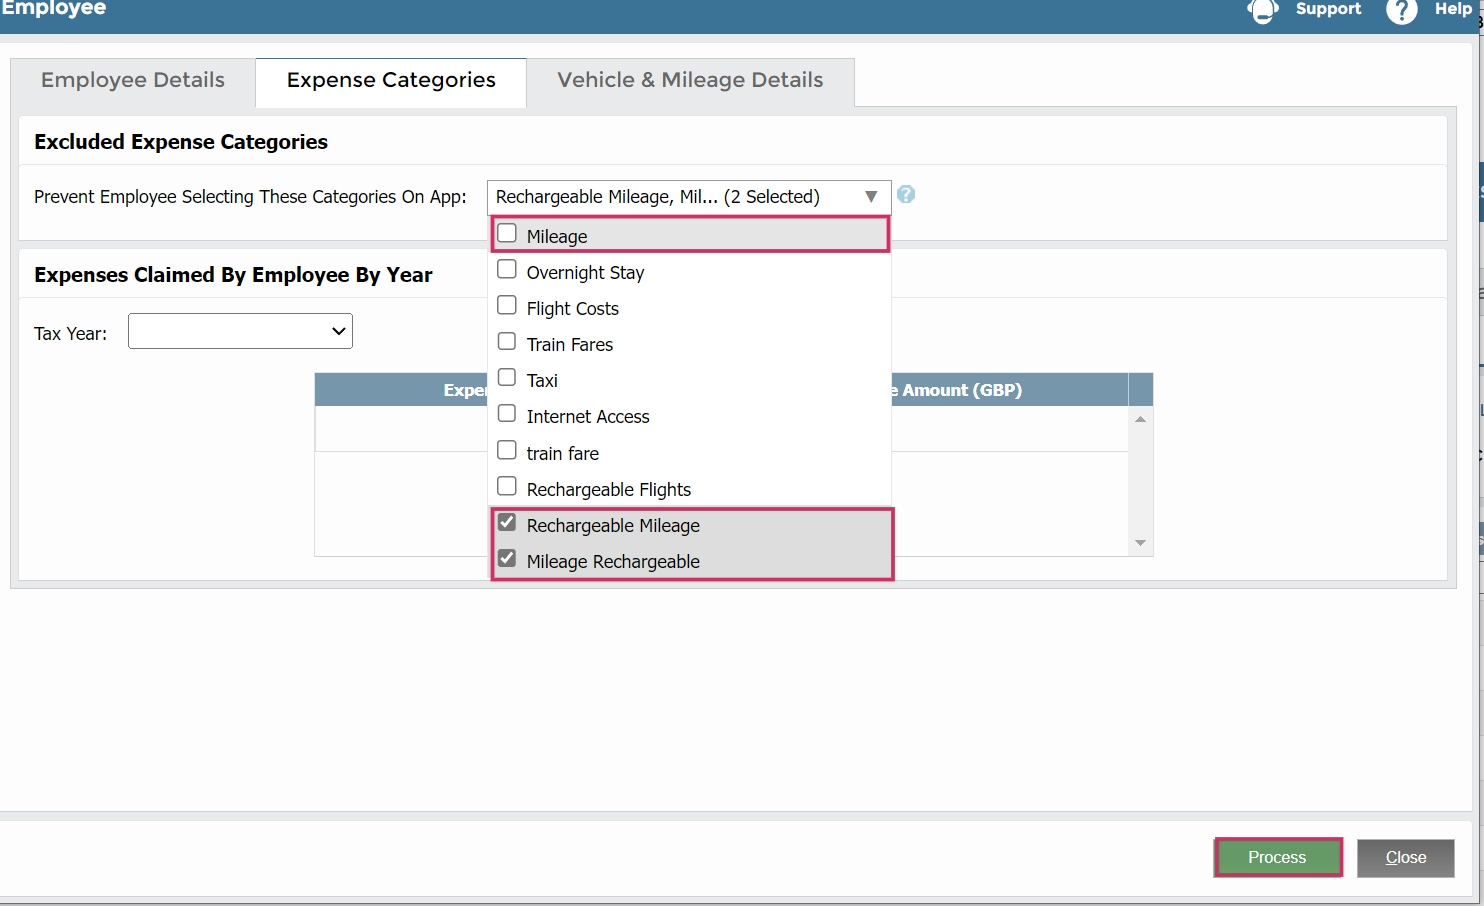
Exclude Expense Categories
- Open the Expense Categories tab.
- From the dropdown, select the expense categories that should not be available to the employee. If any mileage expense categories were set up previously, check them so that only the new ‘Mileage’ option will be available for employees in the expenses app.
-
Click Process.
View Expenses Claimed By Year
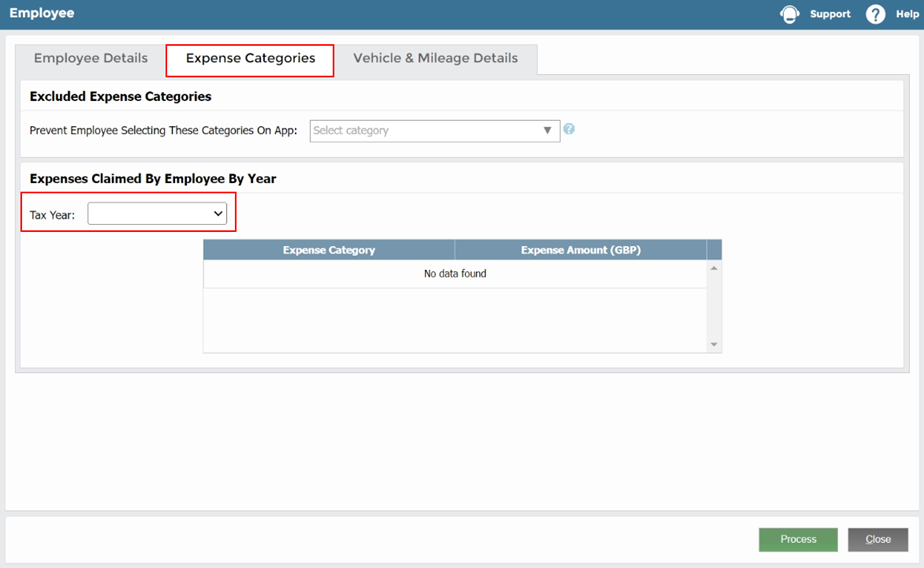
- Open the Expense Categories tab.
-
From the Tax Year dropdown, select the relevant year. This will display the following in the read-only table:
- Expense Category: This displays the expense category description.
- Expense Amount (Base Currency): This displays the cumulative amount for that expense category in the selected tax year.
-
Total: This is the sum of all rows.
Manage Employee Vehicle & Mileage Details
Info
For finance control purposes, it is required that vehicle and mileage details be managed by finance alone and not the employee. These details will be used in the calculation of the mileage expense based on the mileage category bands.
The employee is responsible for informing finance of any changes in their vehicle.
Open an Employee Expenses Record
- Go to Employee Expenses > Employees.
- Click on the relevant name in the listing grid to open the record.
Add Vehicle & Mileage Details

- Open the Vehicle & Mileage Details tab.
-
Enter the following:
-
Vehicle Type: In the dropdown, select a Vehicle Type set up earlier via the Codes Maintenance screen. Alternatively, click +Add new Vehicle Type to set one up now.
-
License Plate: This is required for audit purposes to enable reconciliation of the mileage claims submitted against the vehicle type. The maximum length is 25 characters.
-
Vehicle Type: In the dropdown, select a Vehicle Type set up earlier via the Codes Maintenance screen. Alternatively, click +Add new Vehicle Type to set one up now.
- Click Process.
View Distance & Mileage Amounts Claimed Per Year
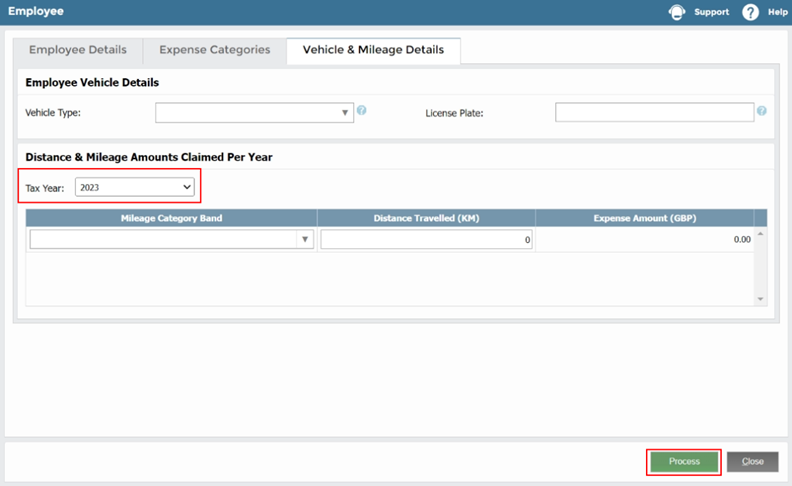
- Open the Vehicle & Mileage Details tab.
- Select the relevant Tax Year from the dropdown.
-
This table is editable for new employees. This table is read-only for employees with submitted mileage expenses. View or edit the following:
- Mileage Category Band: This is the relevant mileage band and engine size combination.
-
Distance Travelled: This is the cumulative distance travelled (kms or miles) for this employee.
-
Expense Amount: This is the cumulative amount for this mileage band for the selected tax year.
- If you have made edits for new employees, click Process.