Introduction
What is the Partner Hub?
The Partner Hub is a secure portal that lets partners add and manage their own users and customers without the need for AIQ support.
Partner Hub User Types
Partner Hub users can be either admin users or non-admin users.
Partner Hub Admin:
The Partner Hub Admin User must be created by an AIQ Admin prior to login. The Admin User role has the highest level of access privileges and is typically for a user who manages AIQ within their partner organisation.
Partner Hub Admin Users can administer their own Partner Hub and its customer accounts, in the following ways:
- Create customer accounts and customer group/practice layers during onboarding.
- Add customer admin users.
- Edit customer details.
- View a customer listing, including status and billing metrics.
- Log into the customer account.
Partner Hub Admin Users can also manage additional Partner Users from within their own organisation for onboarding and support purposes, in the following ways:
- Add other Partner Users, either fellow Admins or Non-Admins.
- Edit Partner Users.
- Resend Partner User invite emails.
- Manage partner User access to customer accounts.
Admin users can also edit their organisation's logo and email address.
Partner Hub Non-Admin:
This user is a typically a partner employee. They need to be invited by the Partner Hub Admin User.
Partner Hub Non-Admin Users can:
- View a customer listing.
- Log into customer accounts if they have been given access by the Partner Admin and customer.
Logging Into the Partner Hub
Prerequisites:
- To use the partner hub as a partner non-admin, you must be invited to set up an account by a partner admin.
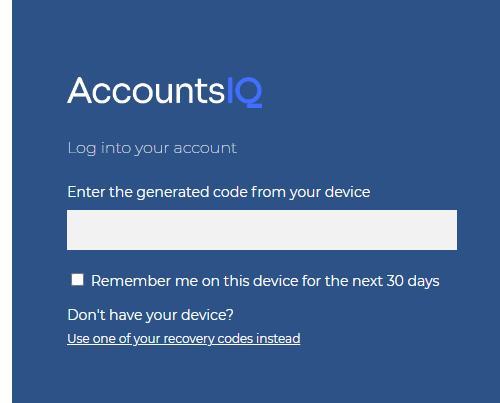
- All users must register for two-factor authentication with an authentication app, following the instructions in your invite email.
To Log In:
- In the Partner Hub login page, enter the relevant partner ID in the Account ID field. The partner ID will have the prefix ‘PART’ plus a suffix identifying the partner. Then enter your User ID and Password. Alternatively use the SSO option.

- Enter your 2FA code to complete login.
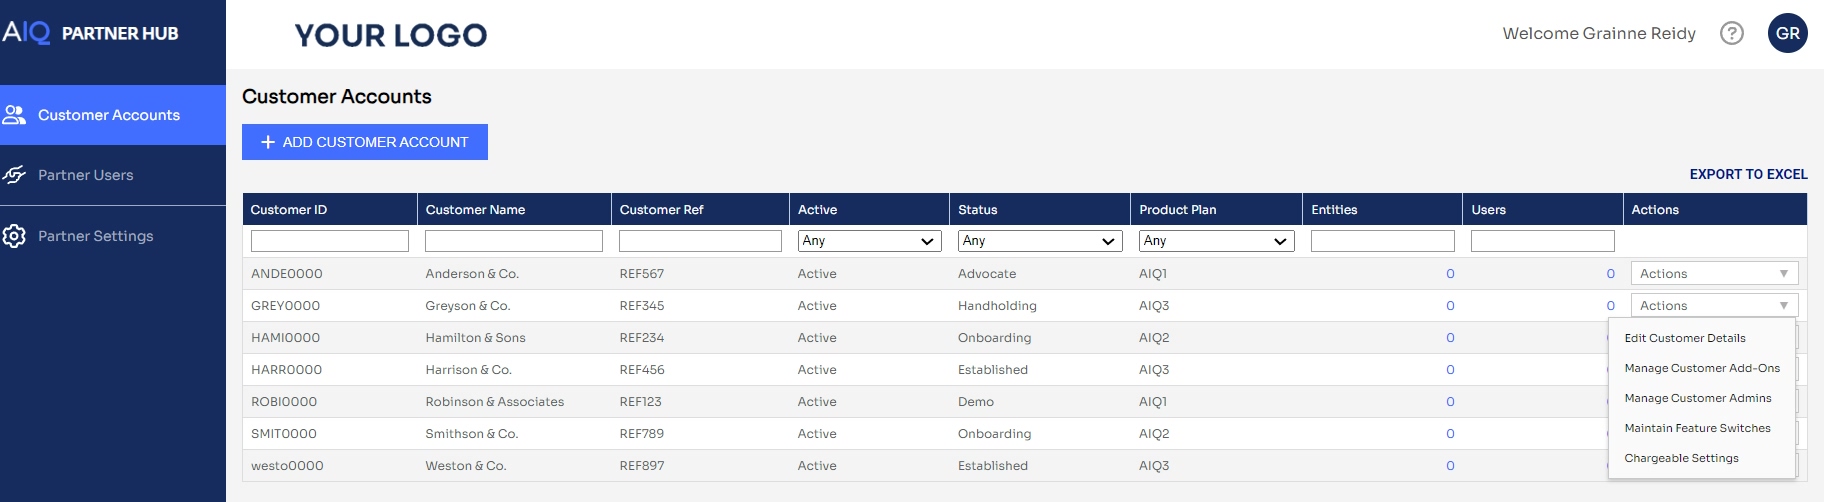
Customer Accounts Listing
The Customer Accounts Listing is visible all Partner Hub users. If you have been granted access to a customer account, the ID will have a hyperlink letting you access that customer layer.
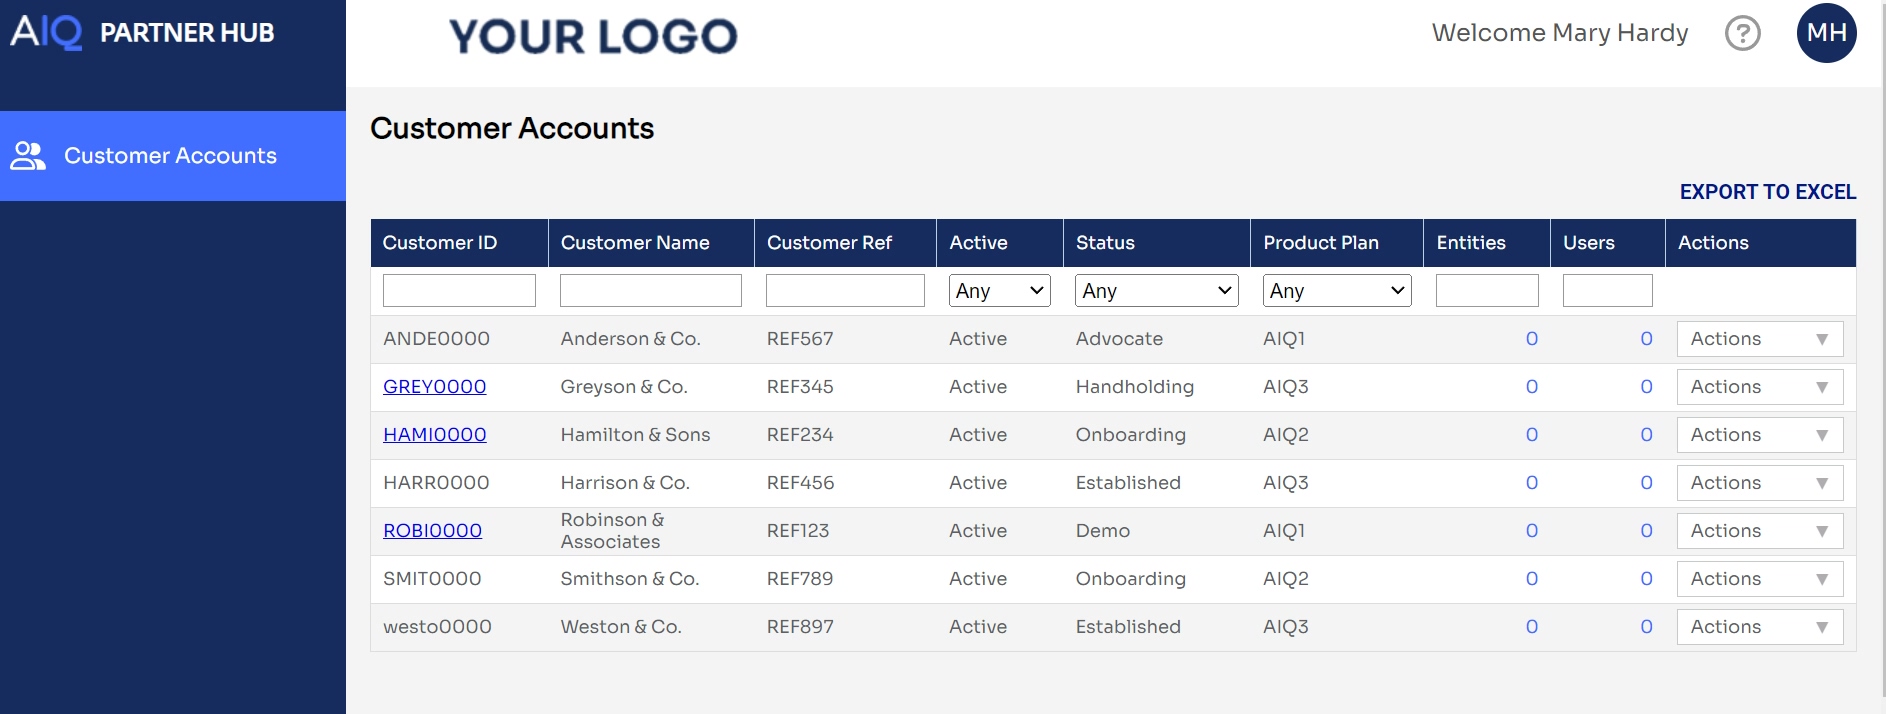
The Customer Accounts grid has the following columns which can be filtered using the column search boxes or drop-downs:
- Customer ID: Login Prefix of the customer account, such as ‘ABC0000’.
- Customer Name: Name of the customer.
- Customer Ref: The Account reference the customer has in your system.
- Active: Indicates whether the customer is active or not.
- Status: Customer’s status, as maintained against their record. This is useful for filtering.
- Product Plan: If the customer is assigned to a product plan it will be shown here, and if not, this will be blank. This column is always shown even if you do not use Price plans.
-
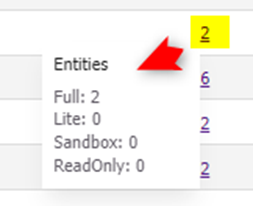
Entities: Hovering over the contents will show a breakdown of the total number of entities by type:
-
Users: Hovering over the contents will show a breakdown of the total number of users by type:

To export the Customer Listing data, click EXPORT TO EXCEL.
Edit a Customer Account
Edit a Customer Account that was added by a Partner Admin.
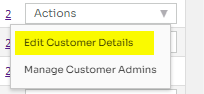
- In the Actions drop-down against the relevant customer and select Edit Customer Details.
.png)
- Edit any of the following fields. Note that Customer ID cannot be edited:
- Active: If you deactivate this, logins to this customer will stop working.
- Customer ID: This cannot be edited. If it is incorrect, make the account inactive instead.
- Customer Ref: This is the unique reference your organisation uses to identify the customer. It could be from your own accounting system.
- Customer Name: Enter the customer account's full name. It will appear in listings and in the customer’s own account.
- Website: Enter the customer’s website to appear in their account.
- Contact Name: Enter the customer’s contact name to appear in their account.
- Contact Email: Enter the customer’s email to appear in their account.
- Termset: Select the correct terminology to appear in the customer's account: “Group”, “Practice” or “Franchise”.
- Product Plan: If you are using AIQ’s price plans (“On Price Plan” is selected against your record) a drop-down will appear for you to select the customer's price plan. Their price plan determines the AIQ functions available to them. If you are not using AIQ’s price plans, this option will not appear, and you can select add-ons instead.
- Sector: Select the customer's sector from the drop-down. AIQ will add to this list if more options become necessary.
-
Status: Select the customer’s status from the drop-down. You can use this for filtering purposes. They are listed chronologically:
- Pre-Sales
- Demo
- Onboarding
- Handholding
- Established
- Advocate
- Read Only
- Churned
Customers can log into their accounts regardless of status. If their status turns to ‘Churned’, the customer will not be automatically deactivated. Instead, you must switch off the Active flag.
The status field is used in conjunction with the Requires Customer Access Permissions flag. This determines how and when Partner users can log into Customers via the Partner Hub (see Requires Customer Access Permissions section below).
- Enable Embedding by iFrame into Other Apps: Choose whether AIQ can be embedded within another application via an iFrame. AIQ security settings normally prevent this but will allow exceptions based on URLs. If this flag is on, enter the relevant domain in the field that appears so that it will be authorised.
- Group Accounting Module: This can only be updated by admin users.
- Click Save.
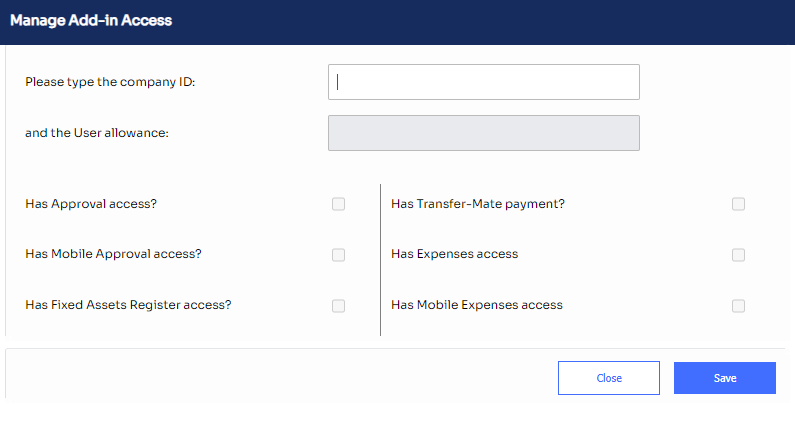
Manage Customer Add-Ons (Non-Product Plan only)
- Go to Customer Accounts.
- In the relevant Actions dropdown, select Manage Customer Add-Ons.
- In the Manage Add-in Access screen, complete the relevant details and click Save.
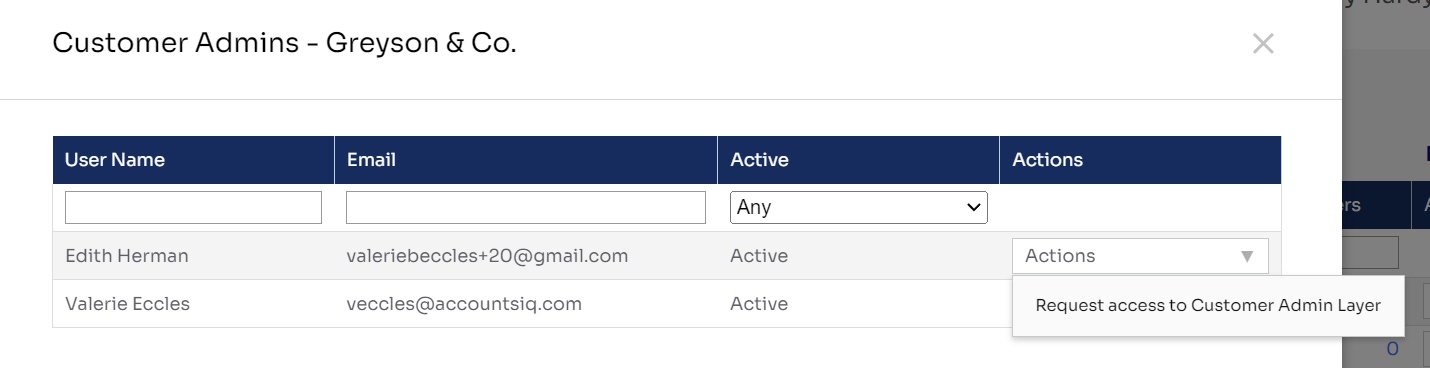
Request Access to the Customer Admin layer
Request access to the customer admin layer for onboarding and support purposes.
- Go to the Customer Accounts tab.
- In the Actions drop-down for the relevant entity, select Manage Customer Admins. The Customer Admins screen shows a list of existing Customer Admin Users with their user login name, email address, and active status.
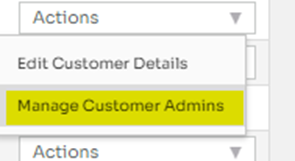
- In the Actions dropdown, click Request access to Customer Admin Layer. The Customer Admin will receive the access request via email.