Introduction
What is the Time and Billing Module?
The Time and Billing module, along with the full AIQ suite, make up the Project Accounting system. This system provides extensive budgeting and reporting capabilities, full supplier purchasing facilities, and client billing and account administration.
The Time and Billing module records:
- All employee time against projects and activities for any number of client projects.
- All associated expenses, supplier bills, and other miscellaneous charges and outgoings for each project.
This facilitates project and client billing by tracking all charges and costs for a project together with backup documentation. Based on this data, you can post transactions, produce project profitability, receive payments, manage suppliers, and more.
Find it in the sidebar:
.png)
What are Projects?
Projects consist of activities whose number and type are dependent on the business and the project Employees who perform these Activities.
Project Approvers (“Team Leaders”) are responsible for:
- Setting up and managing individual Projects.
- Preparing the Schedule of Activities together with the allocation of Resources (Project Employees) to each of the activities in the schedule. The Team Leader can later alter the schedule. The Project Employees have access to the schedule to view their own allocated activities.
It is the responsibility of each Project Employee to record their time on each Activity against each Project they are working on. Then, either on a daily or weekly basis, submit to their Team Leader for approval and subsequent update, the following:
- Timesheets.
- Any Project related Employee Expenses incurred.
- Any other Project Outgoings.
Accessing the Project Module
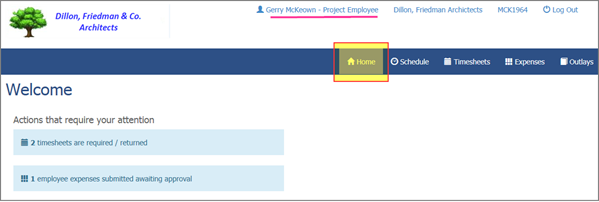
From the main system menu, go to Projects > Time and Billing.
Here you can view the menu options available to you as a Project Employee as well as reminders regarding any outstanding submissions.
See:


Viewing the Schedule
- To view your Scheduled Projects and Activities, click Schedule.
- Using the dropdown, select your or your Team’s Schedule, any Projects, or Activities within a Project. Use the slider to move between weeks and the arrows to move between months.

Completing and Submitting Timesheets
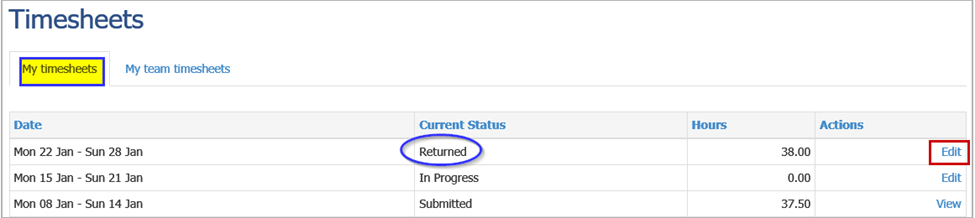
- Go to Timesheets to view the status of any outstanding timesheets. In this example, the Project Employee has one timesheet which has been Approved, one which has been partially completed, and one which requires initiation and subsequent submission for approval by the Team Leader.
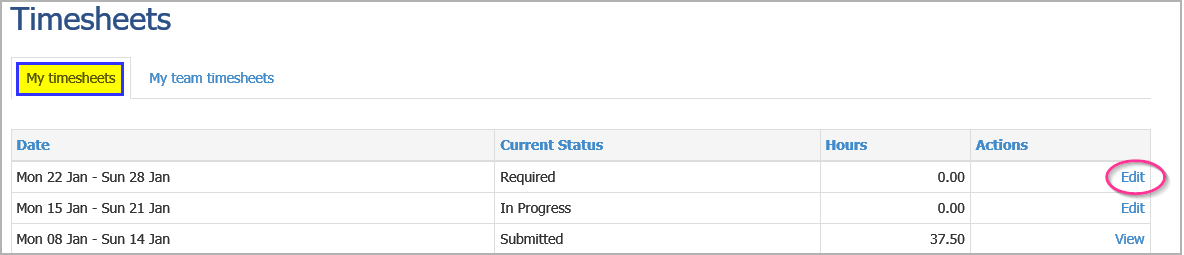
- Click Edit to start a new timesheet or continue with an existing one. The Standard Week for this Employee (previously set up by the System Administrator) will appear here.

- Select a Project and Activity from the dropdowns.
- Click Add Activity for Project.
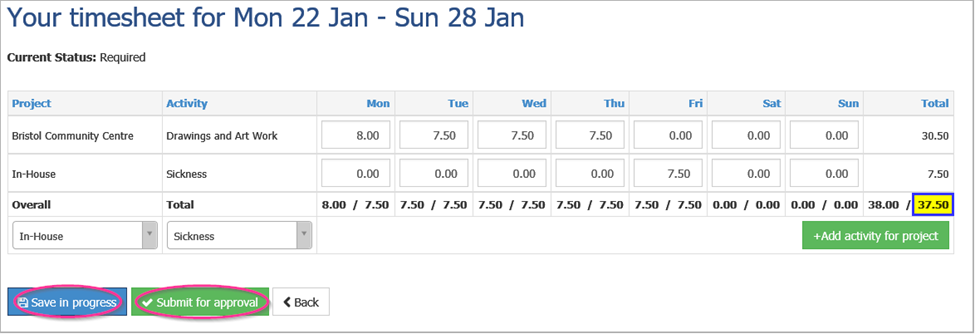
- Enter the hours worked on that Project Activity for each of the relevant days. Click +Add activity for project if relevant.
- Click Save if you want to add further additions later or Submit for approval immediately.
Info
When submitting a timesheet, each Employee must equal or exceed the total hours for the week specified in the Standard Week or else you will not be able to submit it. Therefore, to account for non-billable activities such as sickness, holidays, training, administration, and so on, these will have been set up as Activities against an Internal Project called "In-House", for example.
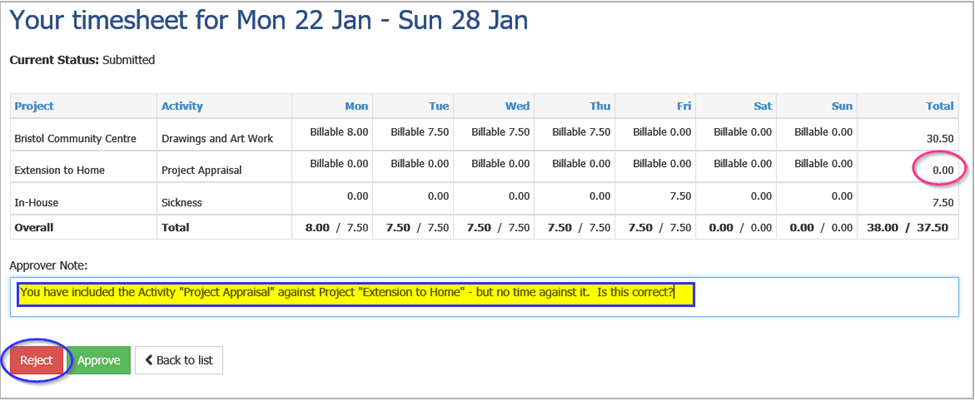
Resubmissions
If your Team Leader has a query regarding the submitted timesheet, they may reject it, along with a reason for the rejection. In that case, the Current Status will be set to Returned. You must edit and re-submit it.
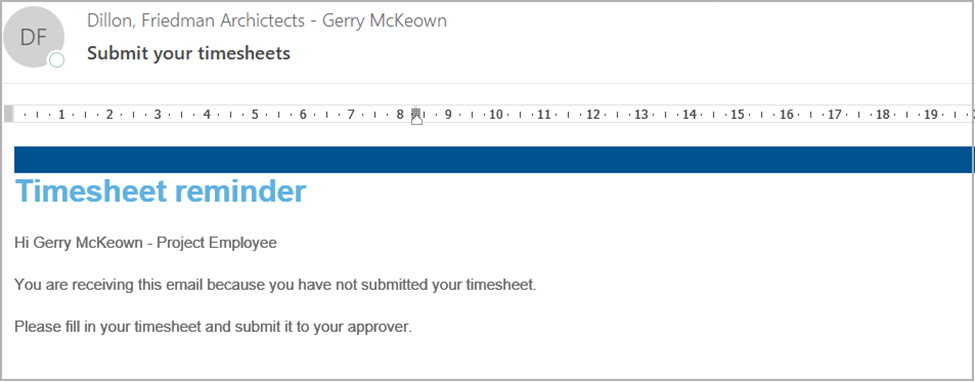
Reminders
You may also receive Reminders, like this email:
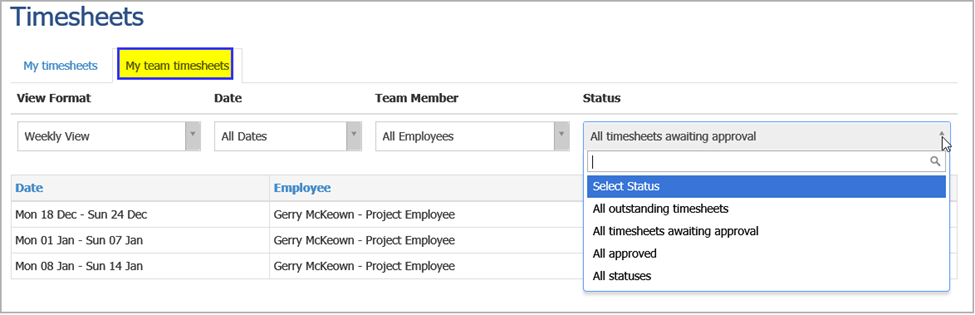
Viewing Submitted Timesheets
If you are a Team Leader and have others reporting to you, you can access timesheets submitted by the members of your team under My team timesheets.
Completing and Submitting Expenses
While timesheets track time against Activities, Expense Claim Forms track costs against Categories. Cost categories are pre-determined and will have been set up in advance by the system Administrator. Submit any expense returns regularly.
Expenses are in respect of direct payments by the employee for the purchase of goods or services. If the expense claim is approved by the team leader, the employee is paid through a Supplier (Vendor) Account in the purchasing system (previously set up by the Projects Administrator).
Creating an Expense Claim
- Before completing, or adding to an existing Expense Claim, scan all the relevant receipts to your Desktop.
- Go to Expenses > +Add a new Expense.
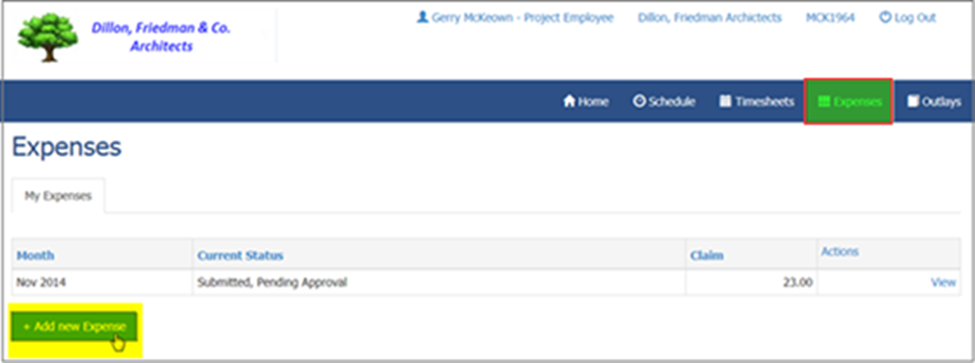
- Complete the following:
- Your expense claim for: This defaults to the last date of the current calendar month, but you can submit expense claims at any time by changing this date.
- Reference: This is solely for internal use by the company or organisation.
- Incurred On: Select the date of the expenditure from the Calendar.
- Project: Select the relevant Project and the relevant Cost Category.
- Net Amount, Vat, Gross: In the Price field, enter either a discrete monetary amount (excl. Tax) or, a rate followed by a number of units (for example, a rate per mile followed by the number of miles travelled). Doing so will update the Vat (Tax) amount based on the previously established rate for that Cost Category, and the Gross amount. In some cases (depending on the Expense Category) it may not be possible to override it as it could be a Company-wide rate.
- Description: Enter a meaningful description of the Expense, both for the Team Leader’s approval and the Client’s ultimate approval.
-
+Add: Click to cause the Browse button to appear. Upload the scanned copy of the backup documentation for this item.
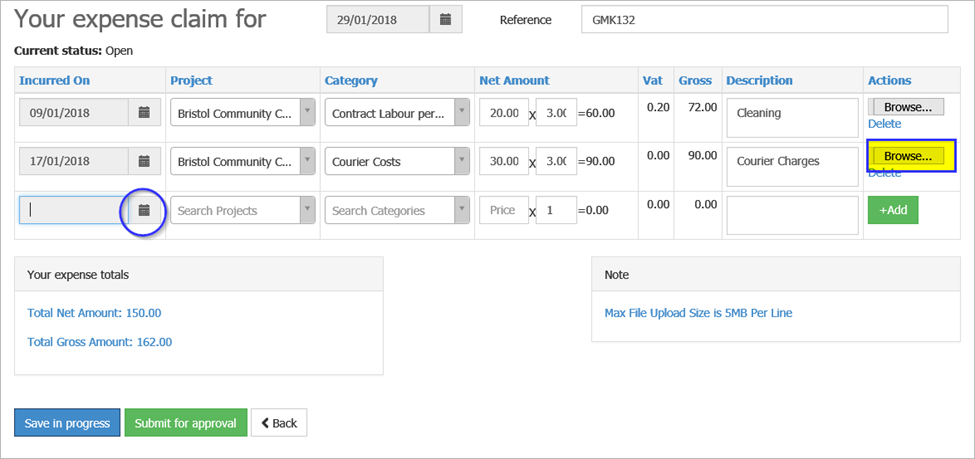
- Click Save in progress to save an expense claim and add more expense lines or Submit for approval to finish with this claim form, or Back to return to the main menu screen.
As with Timesheet entry, your Approver might reject this expense claim. If so, it will show a status of Rejected. Examine the approver’s notes, make any edits, and re-submit. If you made an erroneous entry, delete that line, and re-enter the correct data on a new line.
If you are a Team Leader, then you can also view the Expense Submissions from all other members of your team.
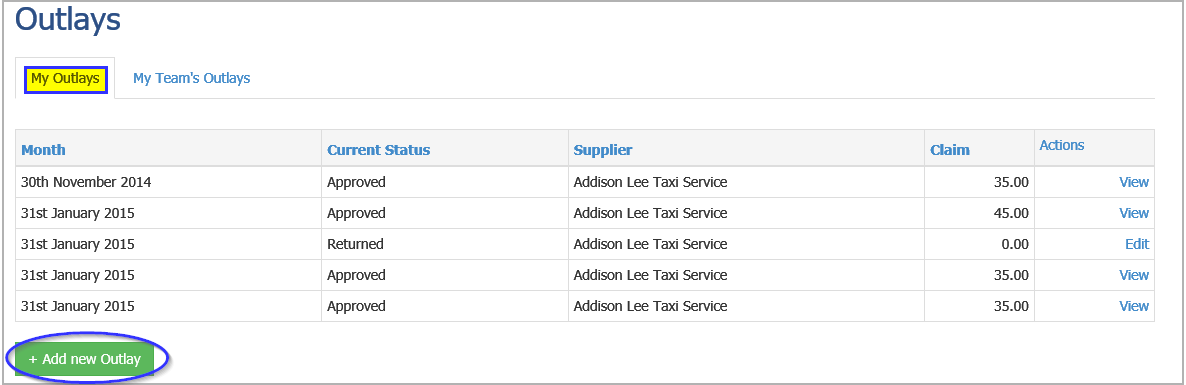
Completing and Submitting Outlays
Outlays are exactly similar to expenses except that they record costs that need to be charged to a Project but which are provided by a third-party Supplier (Vendor) instead of an Employee. Examples can include:
- Taxi Charges which you sign for.
- Small stationary supplies from a supplier with which the company has an account.
- Couriers.
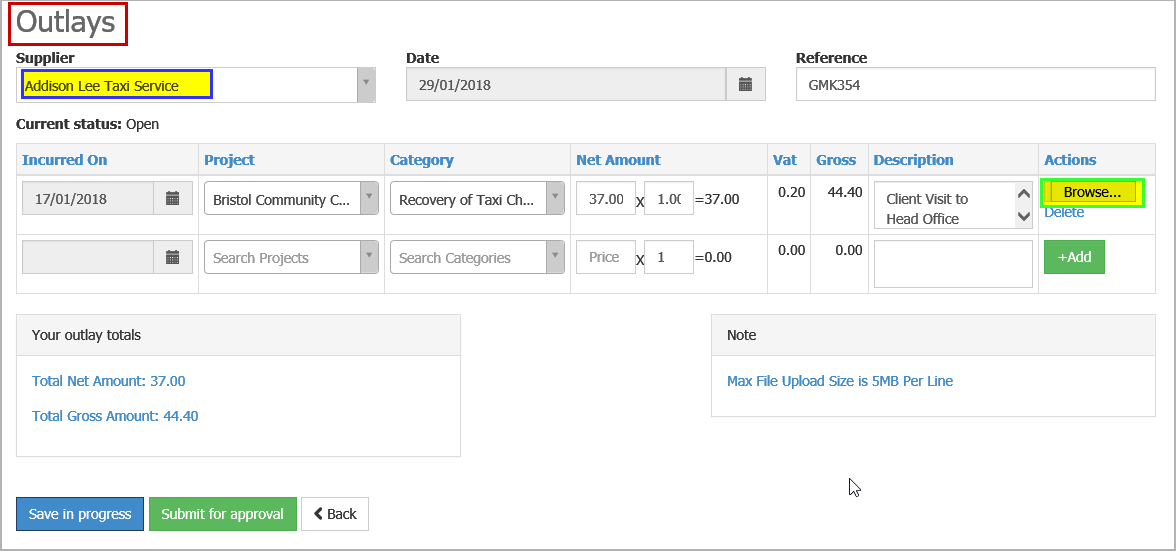
Go to Outlays > +Add new Outlay. Follow the previous instructions as per Expense Claims. The Supplier (Vendor) must have been set up in the purchasing system already so that an Invoice in respect of the charge can be posted to their account for subsequent payment.