
Introduction
AIQ has over 200 accounting reports providing high-quality business performance analysis. Some reports are available in both base and foreign currency. You can run and view multiple reports or the same report with different parameters. You can export the report in a variety of formats including Word, Excel, XLS, CSV, and PDF with your selected parameters.
See:
 11.0 Reporting and Data Query Overview - AIQ Academy
 11.1 Report Manager - AIQ Academy
 11.2 Commonly Used Reports - AIQ Academy
Reports Manager Overview
To Access Reports:
Go to Reports > Report Manager.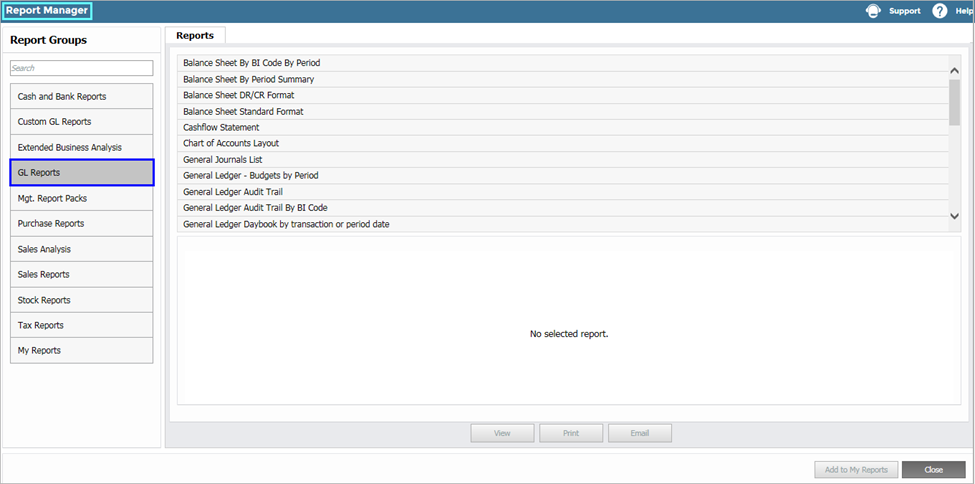
To Search for Reports:
Enter the search term in the field in the top-left of the Report Manager screen. The system will then return a list of matching reports.
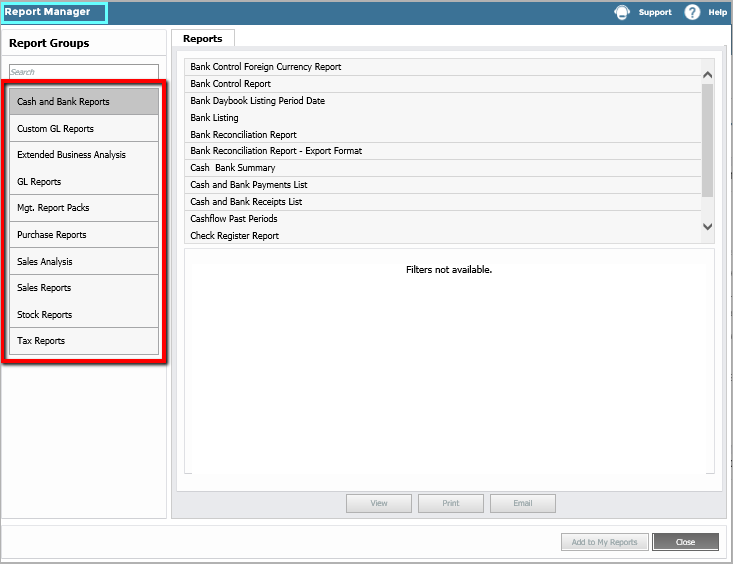
To View Report Groups:
Reports are grouped according to their content and purpose, such as Sales, Cash and Bank, Purchases, or Stock. To return a list of related reports, select a Report Group.
To Select a Report:
In the Reports column, click a report name. The report's data parameters appear under Filter Data By.
DeleteGenerating Reports
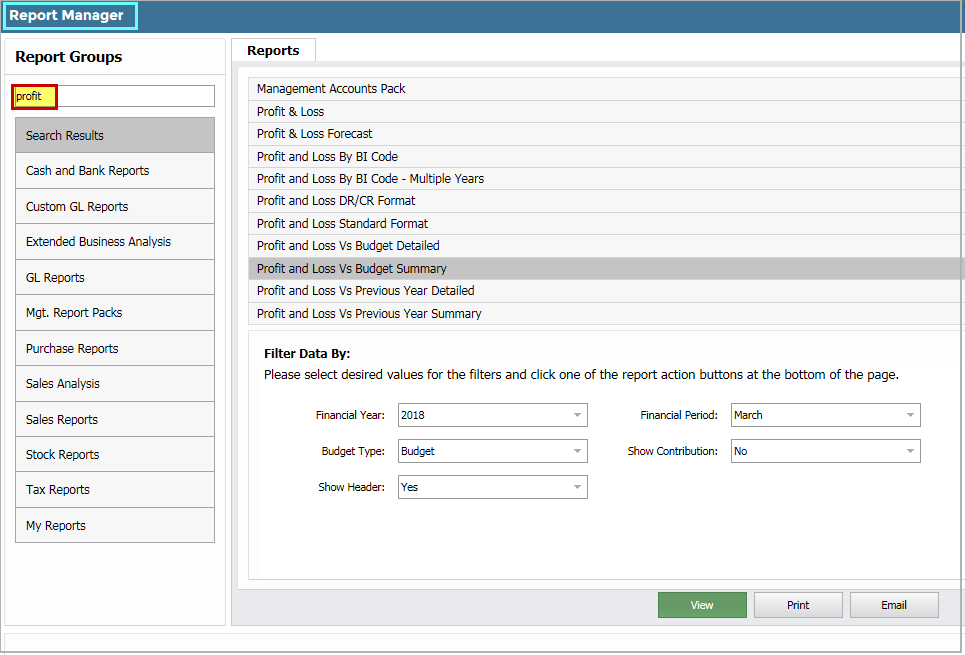
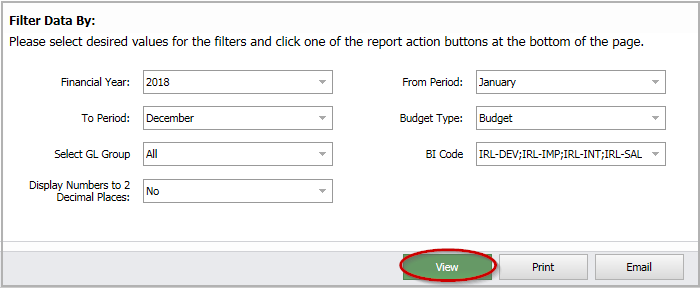
Selecting Parameters on Reports
Common parameters for reports include dates, account names, and transaction types. When you specify a value for a parameter, the report contains only the data that matches the value, for example, transaction data based on a transaction date range.
Each report has its own parameters that correspond to the fields on the report. The parameters selected as a basis for running a report normally appear in the header section of each report. When you run some reports there is an option Show Header. Select No if you intend to export the report to Excel for further analysis as headers can interfere with user-defined formulas.
Filters
Some parameters contain filters that let you set parameters on reports. When you select a report, most filters will already contain default values. However, you can change them, and the system will remember the last parameters you selected. The most common filters are:
- Date ranges: Select a 'from' and a 'to' date to restrict the dates included in the report from the calendar or enter the date manually.
- Drop-downs (single-select): Select one item from the list.
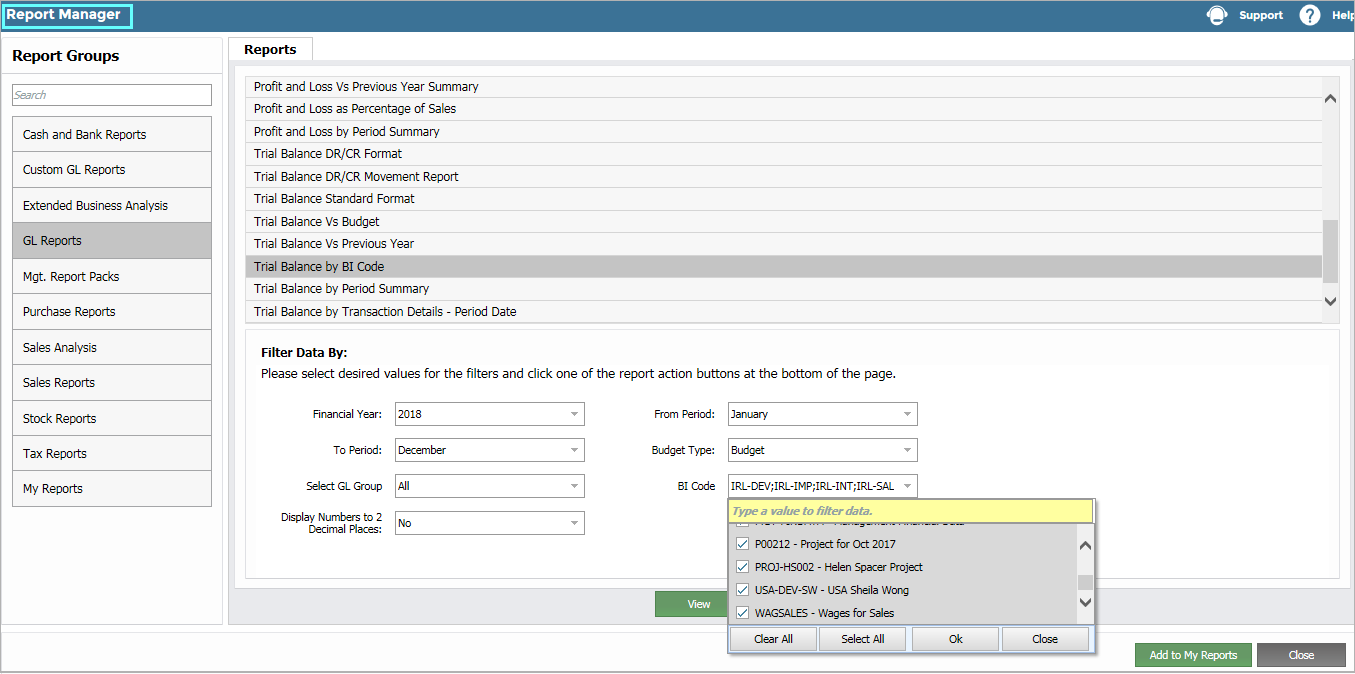
- Drop-down (multi-select): Select more than one item. For example, to generate a Supplier (Vendor) remittance for several Supplier (Vendor) accounts, select the Supplier (Vendor) account codes that you want on the report.
- Free Text Entry: Enter the filter criterion in the field.
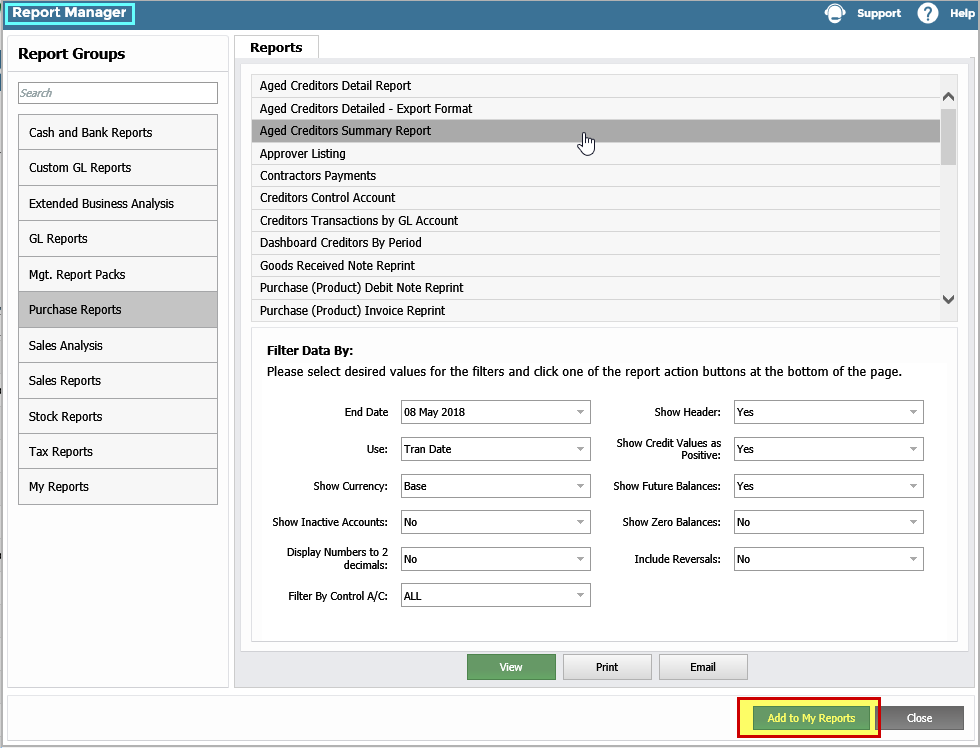
Example: Trial Balance by BI Code
In the BI Code field, you can select BI codes to include by ticking the relevant checkbox or clicking Select All.
Viewing Reports
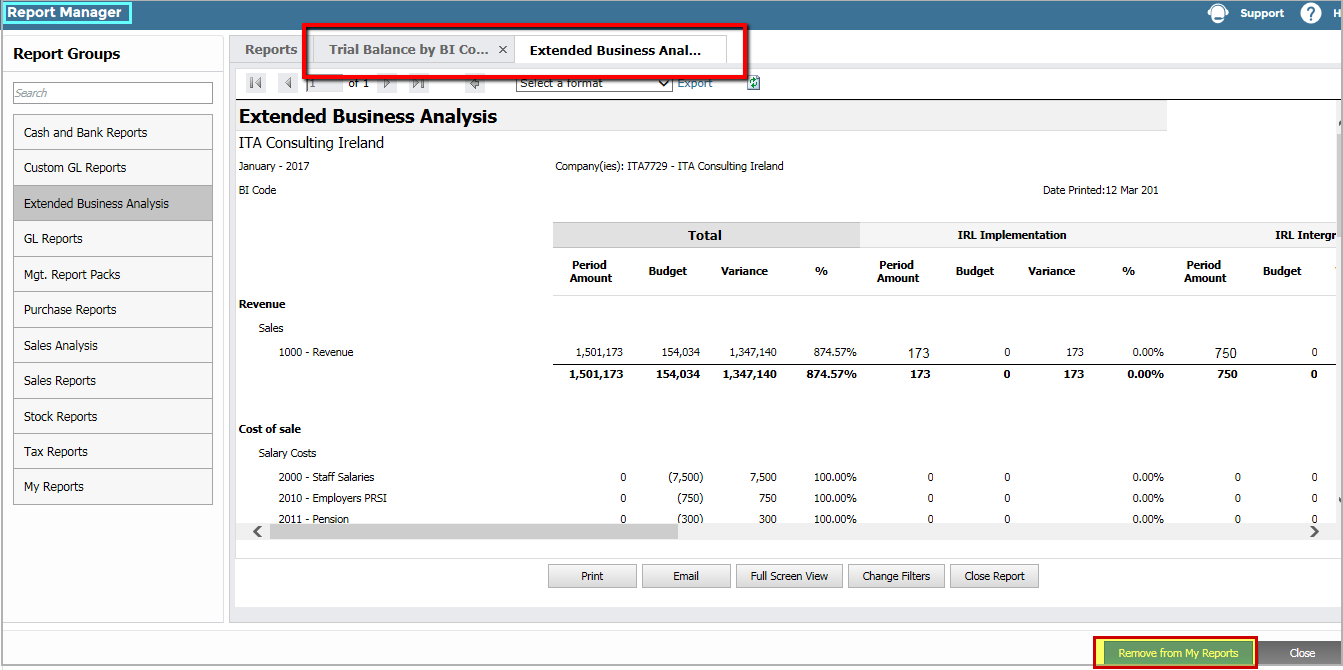
Generate a report by clicking View. This creates a new tab for the report. You can open several reports at one time and navigate between them in the different tabs. This is useful for comparing information in different reports.
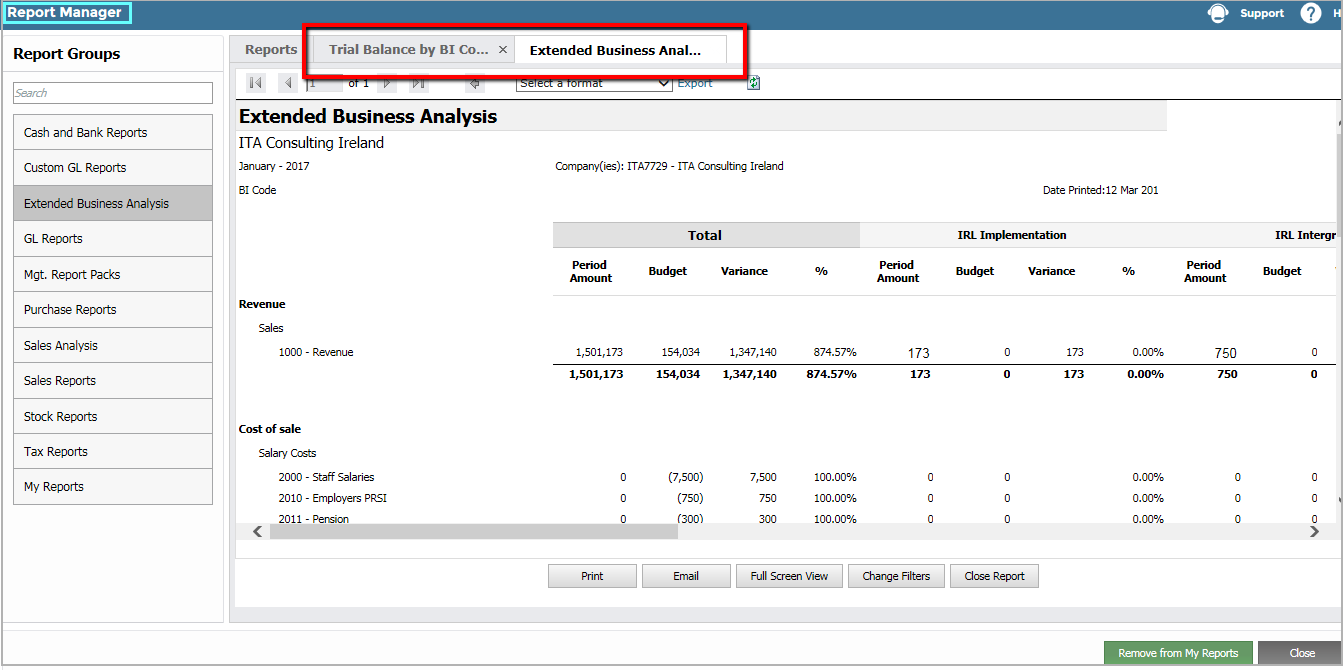
When you have generated your report, you can:
- Print: Generate a PDF print file by clicking Print. Ensure that you have Adobe Reader installed on your computer to enable you to open the report as a PDF.
- Email: Click Email to email the report directly. This opens the email screen with the report attached as a PDF document. Enter the email address, cc, subject, and message. The 'from' email address defaults to the email saved in the user profile.
- Full Screen View: Click to open the report in full-screen mode.
- Change Filters: This brings you back to the main report screen where you can change your parameters and click View to re-generate the report. This lets you view multiple versions of the same report as they will appear in different tabs.
- Close Report: When you are finished viewing a report, close its tab by clicking Close Report.
Navigating the Report
To Navigate through Report Pages:
In View mode, use the single arrows to navigate through a report page by page or the double arrows to skip to the end or beginning of a multi-page report.

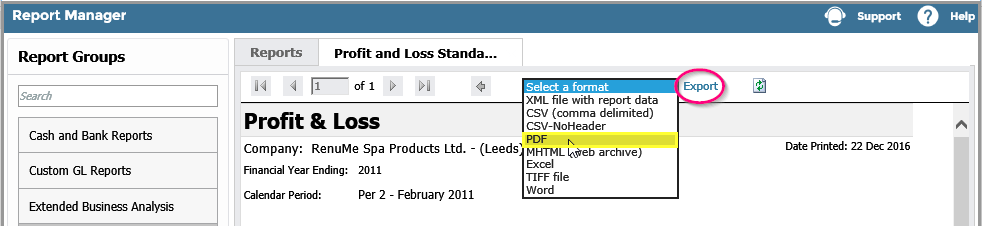
To Select a Format:
Select the desired format from the dropdown and click Export.
To Refresh a Report:
Click the Refresh icon to bring in any new data into the report.
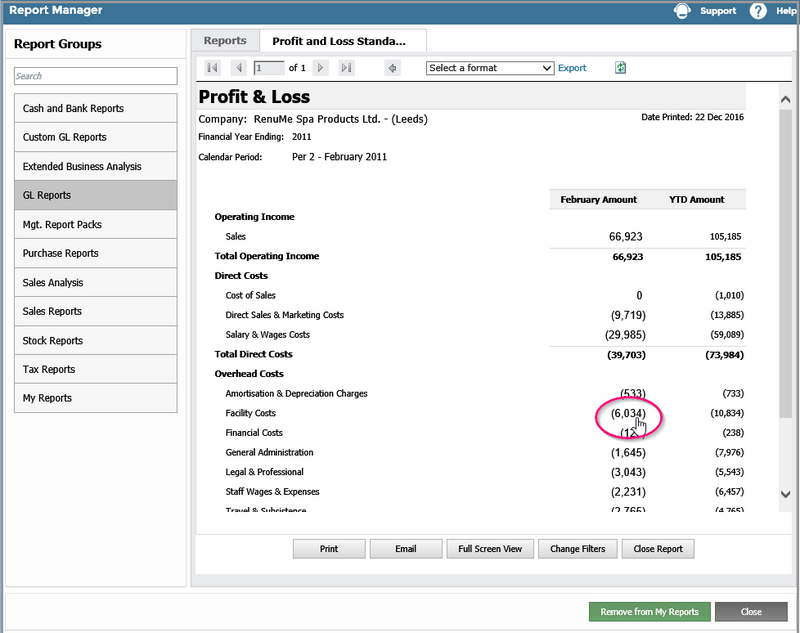
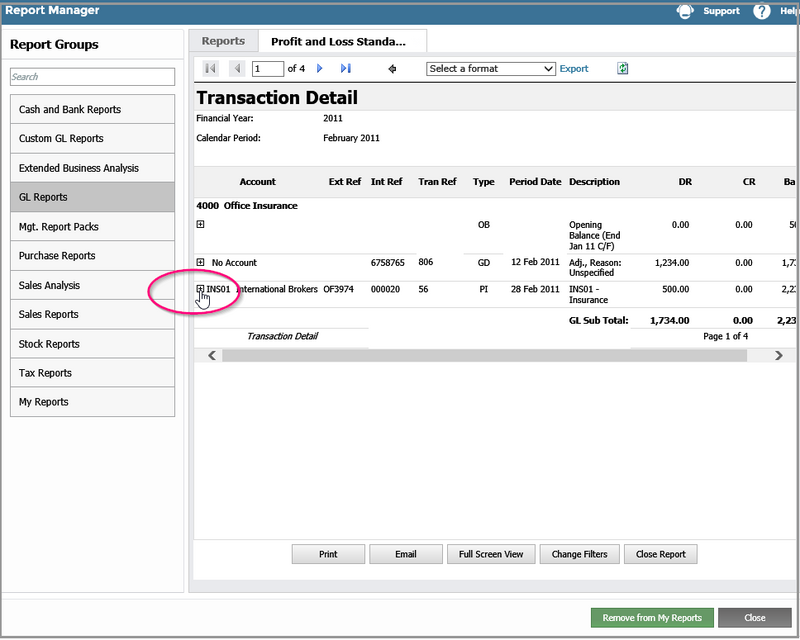
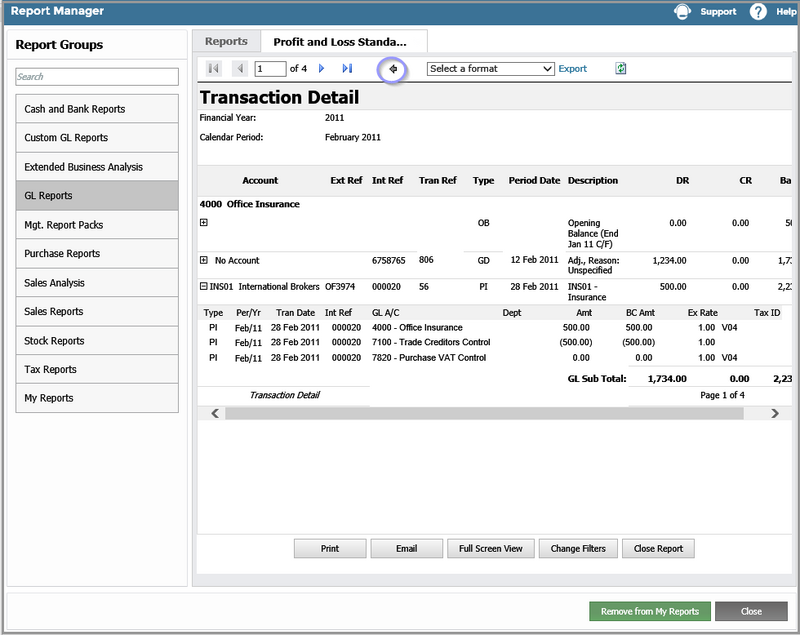
To Drill Down a Report:
Many of the reports feature a drill-down capability. Click any of the figures in the report and, where drill down is available, you can view the detail behind that number. In some cases, you can drill down multiple times.
To Return to the Main Screen:
Click the back arrow to navigate back to the top screen.
Favouriting and Unfavouriting Reports
As AIQ has over 200 reports, you can add favourite reports to both the Reports > Report Manager and Reports > My Reports, for easy access.
Favouriting from the Report Manager
- In Reports > Report Manager, select the relevant report.
- Click Add to My Reports.
Unfavouriting from the Report Manager
- In Reports > Report Manager, select the relevant report.
- Open the relevant report in View mode.
- Click Remove from My Reports.
Favouriting and Unfavouriting from Add to my Reports
- Go to Reports > Add to my reports…
- Use the arrows to add (or remove) reports to the Favourite Reports column.
- Click Process.

Report Dates and Calendar Periods
Date Format
Most reports use the date format specified in your browser's language settings. Therefore, if your language setting is English UK, the date parameters will be in date/month/year format. Alternatively, if your language setting is English US, it will be in month/date/year format.
Financial Periods
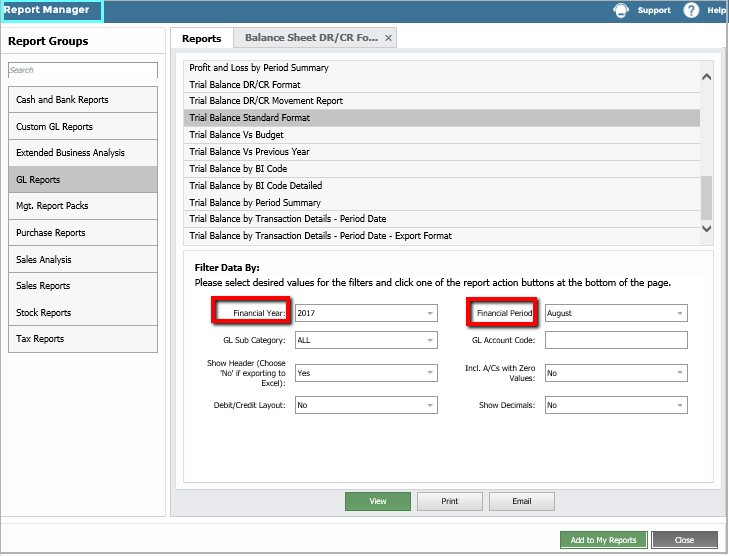
Financial periods do not always coincide with calendar periods. For clarity, General Ledger Reports show the Calendar Period. Ensure you select the correct financial year and always double-check the Calendar Period field prior to using the data contained in the relevant General Ledger Report.
Financial years can be either:
- Calendar financial year: January 2017 to December 2017 would appear as the year 2017, or the year ending 2017. To view a Trial Balance for August 2017, select Financial Year - 2017 and Financial Period - August. The data displayed would list August 2017.
-
Non-calendar financial year: March 2016 to February 2017 would appear as the year 2017 as the last period is February 2017, or the year ending 2017. To view a Trial Balance for the month of August 2017, select Financial Year - 2017 and Financial Period - August. The data displayed would list August 2016.
It is possible to have a Retail Calendar applied for your reports. Please contact your local support team to find out more about this.
DeleteCustom Reporting requirements
If none of the Reports included in the Dashboard, General Ledger Explorer or Report Manager meet your requirements, please contact your local support team. We can build a customized report for you.
Delete