
Introduction
After completing the appropriate agreements with your System Provider, you can brand the system. This will be of interest primarily to those with many end-user client companies, such as:
- Accountancy Practices
- Franchise Owners
- Suppliers (Vendors) of Specialist Niche Solutions
- Front Office Systems
- Business Outsource Providers or System Integrators
See:


Create a custom URL
The first part of the URL is fixed, generic, and chosen by the organization hosting the system and cannot be changed, for example, “https://hostacct.com”. If you want a branded URL, provide a system name and we will combine it with the generic address. For example, “hgacloudaccountingsystem” would create https://www.hostacct.com/hgacloudaccountingsystem.
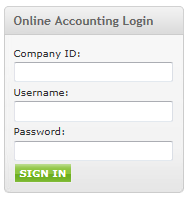
Embed a System Login in your company website
Make a login available on the corporate website. Contact your local support representative for advice. We have generic templates that your developers can incorporate.
White Labelling the Group
Prepare a Practice Banner, Practice Logo, and Powered by Logo (.jpg) and save them on your Desktop. The Practice Logo and Practice Banner can be the same. These are the recommended dimensions:
- Logo File: Recommended image dimensions: 300 x 84 pixels.
- Banner File: Recommended image dimensions: 410 x 84 pixels.
- Powered By File: Recommended image dimensions: 200 x 30 pixels.
- In the group layer, go to Setup > Group Details.

- Upload the three images in the following fields in their respective fields.

- Complete the following:
- Powered By URL
- Custom Login URL: This is the Login page of the corporate website. It is important to enter this correctly to ensure your client users will be redirected to this branded page when they log out. In addition, new or existing users who create or reset their passwords via the password reset page will be redirected here. Contact your local support representative if you have any technical queries.
- Terms & Conditions URL
- Group term set: Select between Group, Practice, or Franchise.
- Click Process.
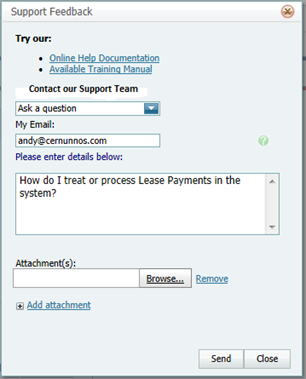
Set Support Information for a Practice
On the client’s main menu screen, clicking the Support button displays a form that allows end users to send a support email to the helpdesk.
- Set the helpdesk emails in the group layer. Go to Setup > Group Details.
- Set the following:
- Primary Support Email: Primary email address to which customer feedback will be directed.
- Secondary Support Email: Alternative email address to which customer feedback will be directed.
- Support System URL: Copy the web address URL of the required support ticketing system into this field. If this field is populated, the system will open this URL when the user clicks 'Support' within the system.
- Click Process.

Set Logos for Invoices and Statements
- Log into one of your Practice Clients.
- Go to Setup > Company Details & Settings.

- In the Company Details tab, go to Upload Logo File field and browse to the relevant image. You or the client should do this immediately as it will appear on the Client’s Invoices, Statements, and other documentation. Also, see Using Invoice Customisation for further customisation options.
